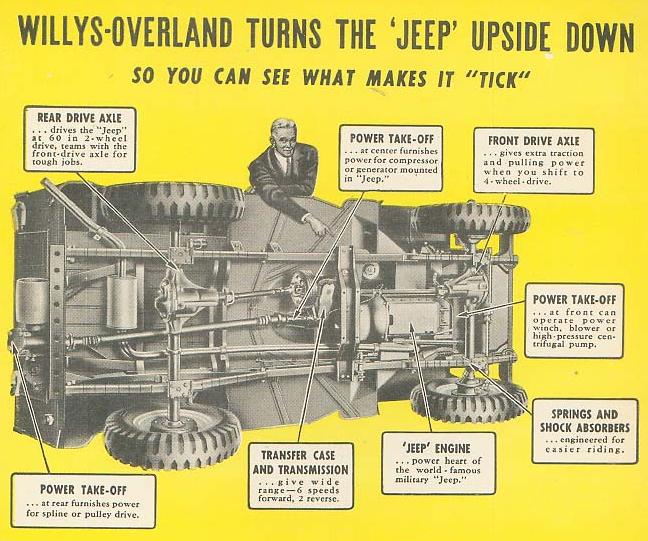
Willys
Rear PTO Driveshaft Rebuild
By Mike Myers a.k.a. lowenuf from thecj2apage
After searching the internet for over a year, and asking anyone who is familiar with CJ2A PTO's, and finding no answers, today I took it upon myself to tear apart, and rebuild with an NOS kit, one bad end of a PTO driveshaft.

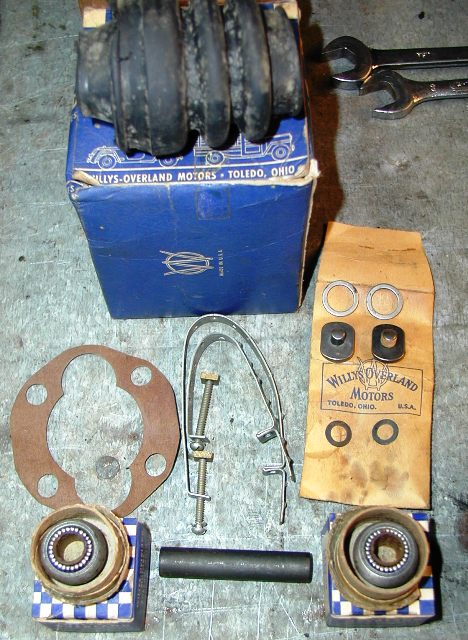
NOS rebuild kits, each box contains enough to rebuild one end of the shaft:
The following is my technical procedure for future reference.....
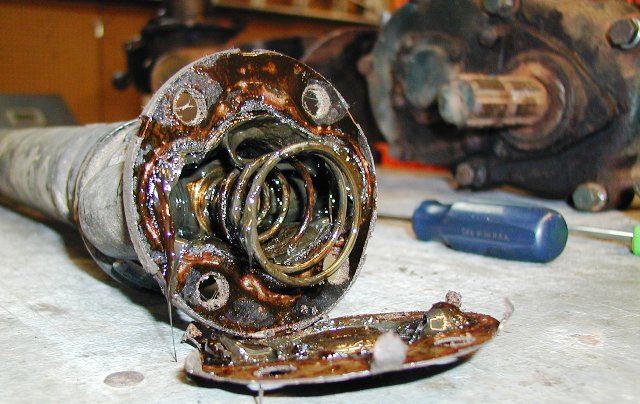
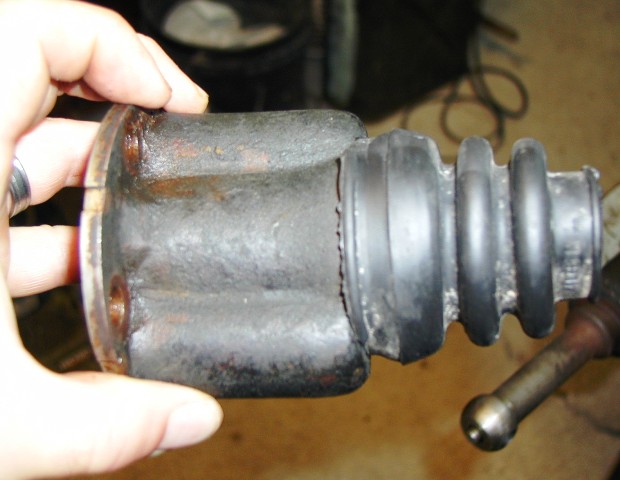
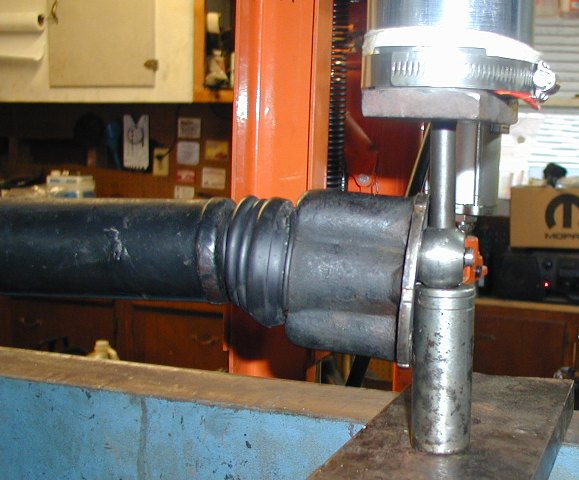
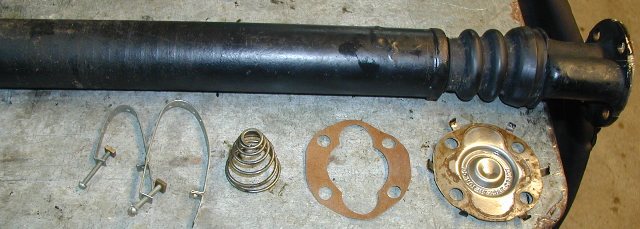
The end with
the bad boot.

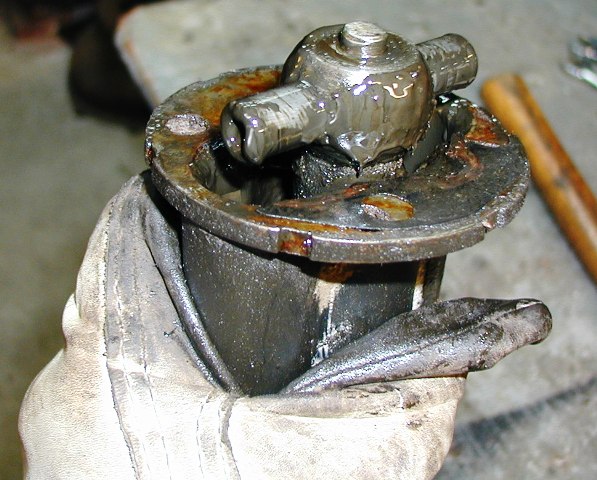
removing the
end plate, be careful with the tabs, as they are soft.

 end plate off, there has been
discussion in the past about the amount of force from the spring in the picture,
it wasn't bad, it didn't cause the end plate to fly or anything.
end plate off, there has been
discussion in the past about the amount of force from the spring in the picture,
it wasn't bad, it didn't cause the end plate to fly or anything.

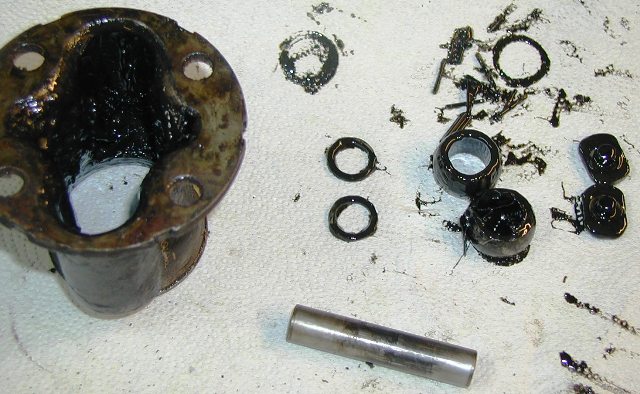
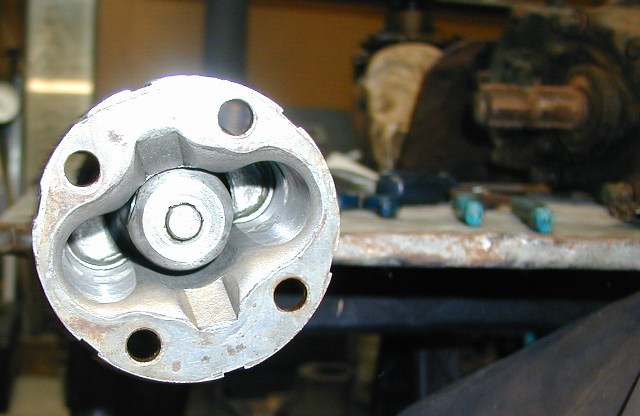
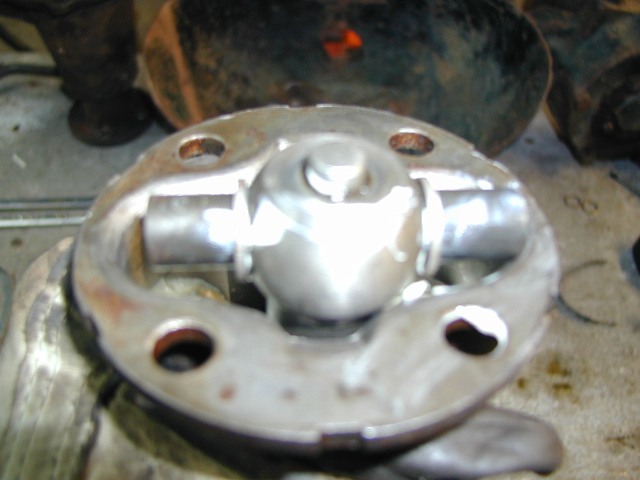
 here are a couple of pics of the
pin/roller bearings inside. hold the housing down, and pull out the end keepers,
then, unless you have a rebuild kit, you will want to be careful here when
removing the rollers, as they have 28 needle rollers on each side, inside, that
you will want to keep track of, then pull off the flat washers.
here are a couple of pics of the
pin/roller bearings inside. hold the housing down, and pull out the end keepers,
then, unless you have a rebuild kit, you will want to be careful here when
removing the rollers, as they have 28 needle rollers on each side, inside, that
you will want to keep track of, then pull off the flat washers.
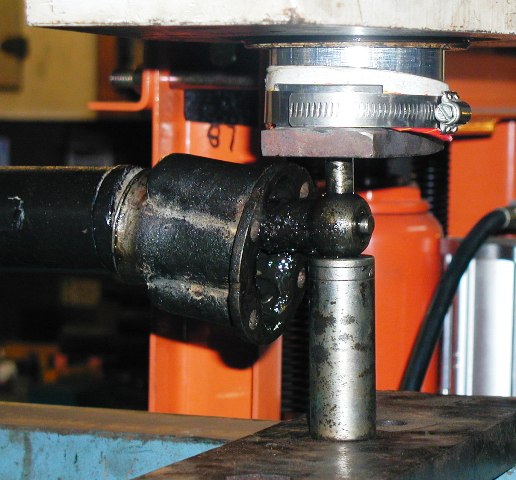
the shaft
will require removal via a press.
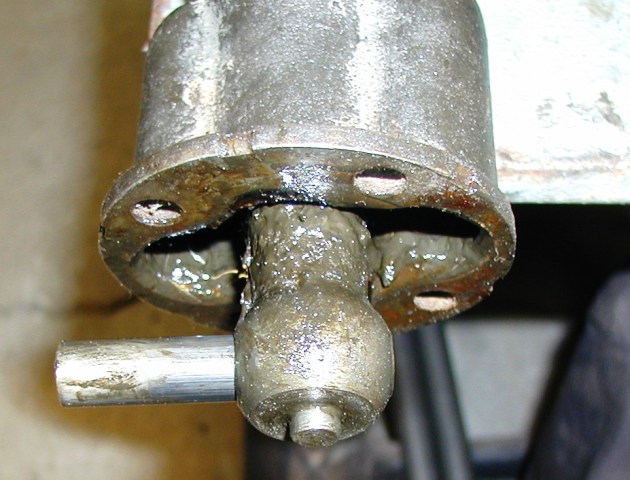
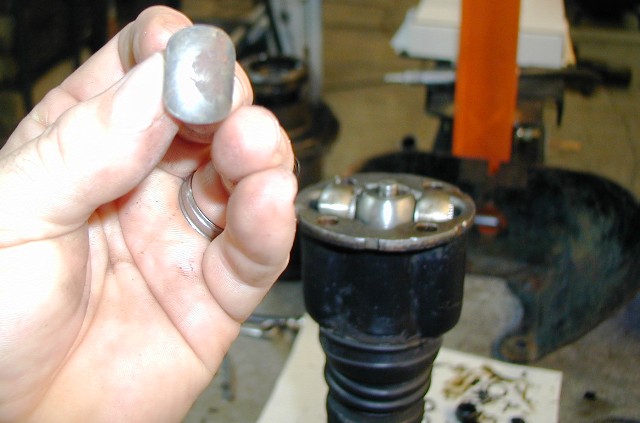
 in this photo, I wanted to share that there is a "pin" pressed into the shank, I
can see no obvious purpose for the pin.
in this photo, I wanted to share that there is a "pin" pressed into the shank, I
can see no obvious purpose for the pin.
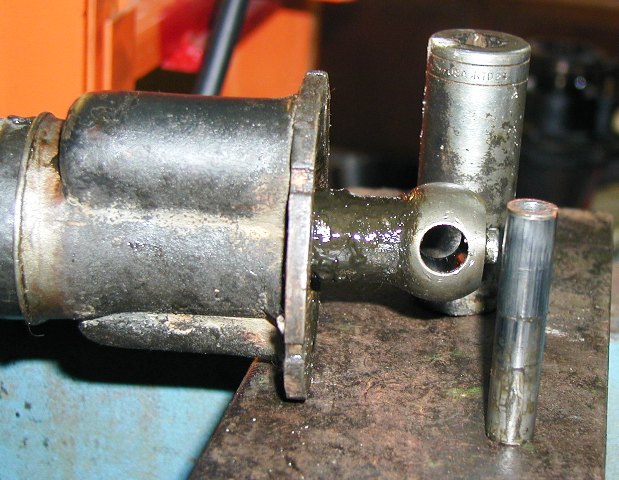
here are the
internals removed, and the original end housing.
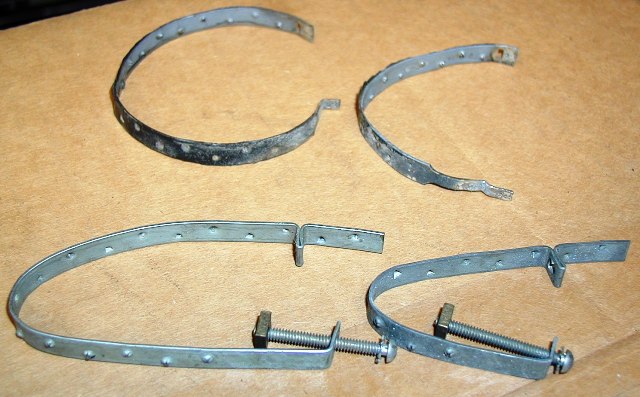 this photo shows differences in the boot clamps, the originals were just
"tabbed" closed, and the replacements have a tang with bolt/nut. also, the
clamps have punched holes in them, and the holes go inward against the rubber
boots.
this photo shows differences in the boot clamps, the originals were just
"tabbed" closed, and the replacements have a tang with bolt/nut. also, the
clamps have punched holes in them, and the holes go inward against the rubber
boots.
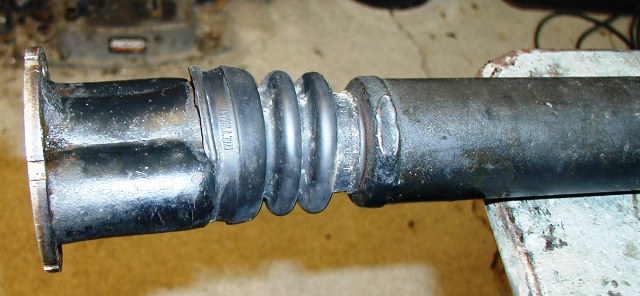
 starting to reassemble, it is easier if you slide the boot onto the housing
first, then slide the whole unit onto the shaft.
starting to reassemble, it is easier if you slide the boot onto the housing
first, then slide the whole unit onto the shaft.
 next you re-install the pin, again, pressing it in, you will have to devise a
way to hold the housing back so that you can have a straight downward motion
allowing the pin to move freely, you end up with 9/16" on each end once the pin
is centered.
next you re-install the pin, again, pressing it in, you will have to devise a
way to hold the housing back so that you can have a straight downward motion
allowing the pin to move freely, you end up with 9/16" on each end once the pin
is centered.
 then you start replacing the kit
pieces, 1st are flat washers that slide over the 1/2" shaft, then you slide on
the bearings/with internal roller needle bearings (28 needles per side), then
you install the outer keepers with a small flat washer on the keeper shaft,
noting that they go in oblong running the direction of the shaft. they will go
in the other way, but the housing will not slide down over them:
then you start replacing the kit
pieces, 1st are flat washers that slide over the 1/2" shaft, then you slide on
the bearings/with internal roller needle bearings (28 needles per side), then
you install the outer keepers with a small flat washer on the keeper shaft,
noting that they go in oblong running the direction of the shaft. they will go
in the other way, but the housing will not slide down over them:

 lastly, you will tap the housing outward until it slides back over the internal
assembly, i elected to use white lithium grease. once the housing is back out,
re-install the large spring, then the outer cover and gasket, bending the tabs
back over the edge, again, be gentle, as the tabs are brittle. also note the
inside of the outer cover, as it has a milled relief, that must align with the
housing, or the internal assembly with not have a full range of motion:
lastly, you will tap the housing outward until it slides back over the internal
assembly, i elected to use white lithium grease. once the housing is back out,
re-install the large spring, then the outer cover and gasket, bending the tabs
back over the edge, again, be gentle, as the tabs are brittle. also note the
inside of the outer cover, as it has a milled relief, that must align with the
housing, or the internal assembly with not have a full range of motion:
 it really is a simple thing once
you get into it, but you WILL need a press for the removal and
reinstallation of the center shaft.....
it really is a simple thing once
you get into it, but you WILL need a press for the removal and
reinstallation of the center shaft.....
enjoy....low
Thanks to Mike to sharing a well documented overhaul of a pto shaft rebuild!