![]()
1985 CUCV M-1009 Project Milverado
(8-29-10)
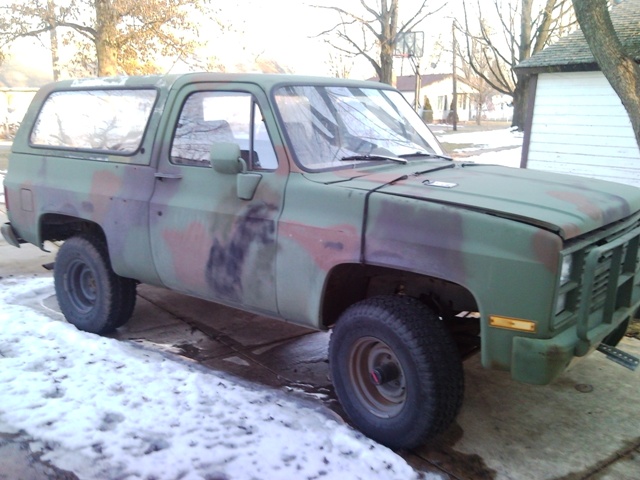
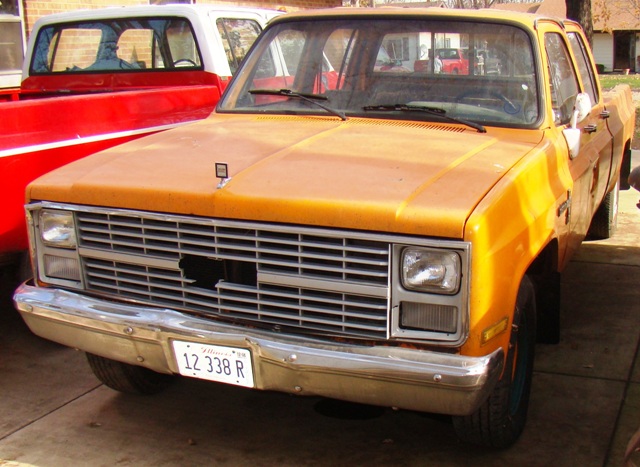
Purchased a 1985 CUCV M1009 (Blazer) with 48K from my local Police Dept in a
Sealed Bid Auction. They procured it from Ft Carson, CO so there is very little
rust and it is in excellent condition. They drove it all the way from there to
Central, IL.
They swapped the 6.2 into another CUCV they already had that was hydro locked
and then rattled.
I've been searching for a donor vehicle (Suburban, Blazer or Pickup) as I don't
know what if anything is missing.
I've was hoping for a Silverado packaged truck for A/C, Cruise, P/L, P/W and
possibly except able door panels and seats w/console.
Everything in Central Illinois within 150mile range has been way overpriced so
the look continues.
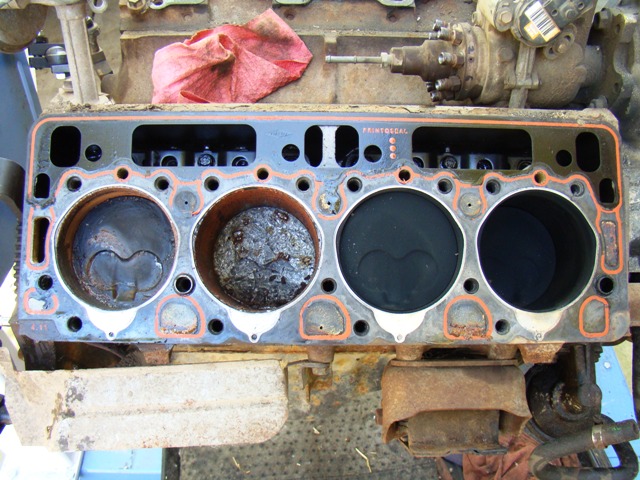
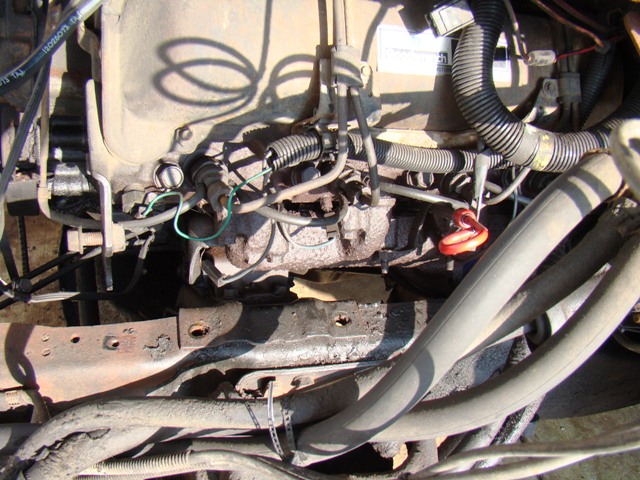
Pulled the 6.2 yesterday and got it on an engine stand. My concerns were correct
as a few wires were cut on the engine swap.
I will pull off oil pan first, what else should I look at or look for from the
hydro lock diagnosis?
(9-10-10)
Still looking for a donor vehicle for engine.
Went to the Pick a pull last Friday, scored a good 87 tilt column with cruise
and intermittent wiper module for $60 came with keys so pulled the door locks as
well.
Also grabbed the dual head lamp harness and turn signal lenses out of the broken
grill, the fender Silverado emblems for a theme idea, the dash Chevrolet emblem
and a/c vents and ducts above the glove box (trim piece has broken)
Thinking about going back for the p/w, p/l pieces but the harness looked like a
bear to pull. Also would like to grab the dash speakers w/wiring and brackets.
The cab corner ones were already gone.
(9-24-10)
Craigslist local score today off an 88 Blazer...
Complete firewall A/C box both inside and outsides with controls and wiring plus
inner ductwork. Still need the radiator side condenser
Both front door panels, P/W regulators & P/L actuators plus all wiring and
relays (man that relay was a bugger to get loose)
Rear tailgate P/W regulator and all wiring from the dash switch to the gate
(frame mount wire clamp was also a bugger)
Both Buckets and Rear Seat
Spare tire
Need some Blue and Pink fuse box ends for the P/W wiring, broke the clips
removing them.
All for $150 and some sweat work.
(11-15-10)
Have not posted since my Birthday in Sept on my CUCV Build but can finally say
we are back on...
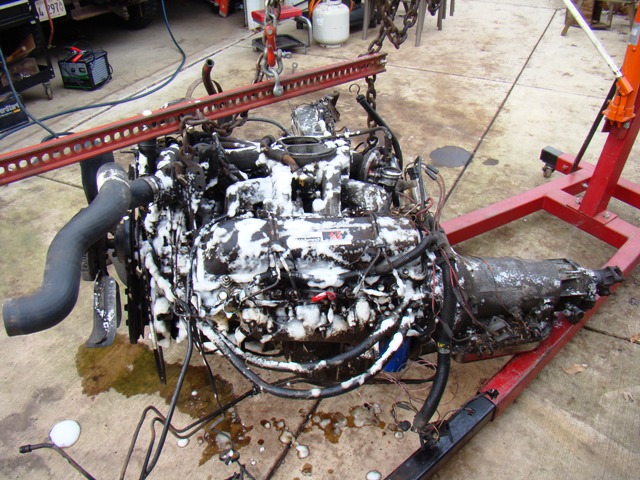
In the mean time I pulled the motor and got it on a stand to assess/diagnose the
problem:
Had been looking for a donor in the mean time.
Scored an 87 CCLB on local CL with a replacement 6.2 Target engine, sounds like
it runs good so bought it and they delivered it for fuel money yesterday.
I started a little body disassembly Sunday afternoon, getting one fender and
inner fenders well off and the other one tonight. The DLS time is killing me
with only about an hour of daylight after work.
Hope to get the radiator drained and the core support off tomorrow and get a
good look for any thing I need to address before swapping into the CUCV.
Did find a fuel leak that ended up being a broken injector return line so
swapped a good one from the old engine.
Hopefully when done I can part out or sell what's left and recoup some of it
back.
(11-17-10)
Got the radiator drained, disconnected the radiator and heater hoses, oil and
tranny lines, wiring harness, and have the core support loose but got to dark so
hopefully tomorrow and pull it.
Also learned it is an emission free J Code 6.2 so that’s another plus.
(11-19-10)
Just about ready to break out the tripod halogens...Do have a 4 day weekend next
week so depending upon what I get done this weekend, I should make some good
progress.
(11-20-10)
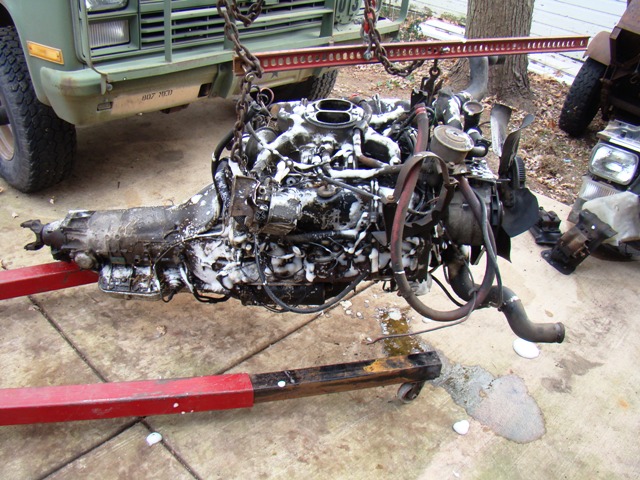
Made some real progress today.
Took most of the day but got the engine and tranny pulled together from the Crew
Cab. Instead of fighting the motor mounts I unbolted the frame mounts and tranny
mount, disconnected the exhaust, driveshaft, speedo cable, and shift linkage and
it came out with a little persuading. Found another of the 101 uses for the
Hi-Lift Jack...
Had a large can of oven cleaner I've been saving for no reason and emptied it on
both. After the clean up and separating the tranny It’s now on the engine stand
to evaluate anything I need to transfer over from the original engine.
After getting the engine removed and looking over the firewall cover, I'm going
to try and use it as well. Might give a decibel of noise reduction.
(11-27-10)
Fought the reinstall of the 6.2 for a couple hours yesterday trying to get the
tranny bolts to line up so today I started off the moring pulling the dash pad,
speaker, cluster, wiring harness, firewall covers, wiper motor, and stainless
gutters on the donor Crew Cab. All went relatively well.
Then spent a couple more hours after on the 6.2 and decided to just pull the
front clip on the CUCV.
It was a real pain with the bumper and brush guard on but I did get it off. I
think I will probably take the fenders off when I reinstall it.
After I got the clip off the 6.2 seamed to go in a lot smoother and I got all
bolts started and even was able to persuade the dipstick into place to catch the
upper bolt and the starter shield to catch its correct bolt just at it got dark
tonight.
I will say the upper two bolts started pretty easy from the top since I was not
fighting a HEI distrib for clearance.
Hope to get them tightened down tomorrow and begin getting everything else
hooked up.
(11-28-10)
Made better progress today...used the pry bar under the manifolds and was able
to get the motor mount bolts in on both sides with a little frustration.
Got all the tranny bolts tightened down, center firewall pad mounted, p/s pump
mounted, and the wire to the gas tank fished through the flexible conduit and
connected, before having to stop and go for the annual quest for the Christmas
Tree.
At least it was sunny but in the 30s versus last year with foot of snow on the
ground.
Didn't get as much done as I hopped for my 4 day weekend but further then I was
a week ago for sure.
(3-15-11)
Finally getting some decent weather again so spent a few hours Saturday and all
day Sunday working on the CUCV.
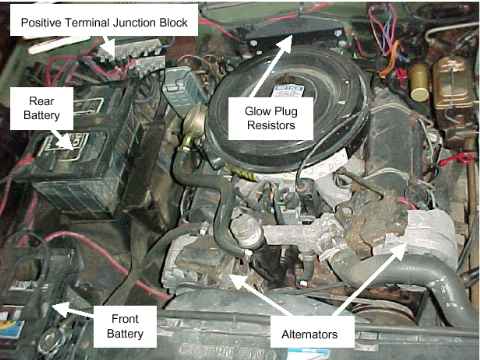
Not getting 12v to the Alt and Glow Plug Relay for some reason. Dropped the
starter to check the fusible links on the starter harness. Traced the wire to GP
relay and is all good as is the wire to the Alt. Ran a separate 6 gauge wire
from the battery to the GP relay it is getting fire. Took a few cycles to get it
started and all the fuel lines purged but she took off after that and seems to
run pretty good.
Disassembled the front clip and got the radiator support and passenger fender
mounted. installed the Crew Cabs wiring harness in the dash and got the tilt
column installed.
(5-14-11)
I swapped in the crew cabs interior dash harness and all the gauges work but the
low water is staying on.
Installed the tilt wheel.
Ordered and received some red LEDs from superbrightleds.com to bulb the cluster
and heater back lighting. I've seen some builds on cleanup, painting the cluster
housing and may end up doing that (left mine stock light blue) as I'm not
getting the results I'd hoped and heard from others who did it with redoing it.
Need to install the cigar lighter socket in the ash tray still and try to get
the dome lamp fished (the CUCV does not have a dome lamp and has a plate tacked
over the hole)
(6-5-11)
Weather is getting real nice and I'm finally catching up with other things so I
can get back on this.
I have about a quarter play in the steering wheel from side to side so need to
figure that out and hopefully close up the dash in the next few weeks, and take
a test drive.
Anyone have any ideas on the low water lamp. I have not ohm’d out the wire but
rad is full and the wire is plugged into the sensor on the tank below the fill
cap.
(6-6-11)
Looking for all of the cruise parts for a 6.2...
I forgot to mention I was able to sell the 2wd Crew Cab locally on CL after
keeping a few items. If you see my parting a 6.2 ad you will also see that I've
been able to part a few items from the pulled CUCV motor so I'm actually at
almost a $100 in the black from the donor truck purchase to gain the replacement
engine.
The donor truck supplied 12V engine harness, dash harness, gauge cluster, good
brown dash pad, engine, radiator, firewall insulation and a few items I actually
resold separately.
CUCV options added to date:
firewall insulation
tilt wheel w/intermittent wiper switch and cruise
gauges (oil pressure, water temp, voltage) and red back lighting
power locks and windows including tailgate ready to be installed
gathering A/C parts
(6-11-11)
Wiper and Washer Upgrade from 87 Chevy Crew Cab
Windshield Wiper and Washer Upgrade/Conversion – took about two hours with cleaning included and finding tools, yours could take less.
We all know the early wipers and washers suck on the GM square body trucks compared to those available on the GMT400 and newer trucks.
When I was removing things from the donor crew cab, the wipers was a definite must so this is a build thread on how I converted/upgraded to this newer option on my 85 CUCV Blazer. I don't know what year the washer nozzles attached to the wiper arms started but it was interesting to learn the holes for the option were actually already there on the CUCV Blazer body and this was a direct bolt on. If you are lucky enough to get all this from a donor truck at a u-pull-it also get the washer bottle, harness and tubing with the T or Y adapter. The washer bottle has the washer pump physically mounted to the reservoir and is a much better design than the vacuum pump integral to the wiper motor design type.
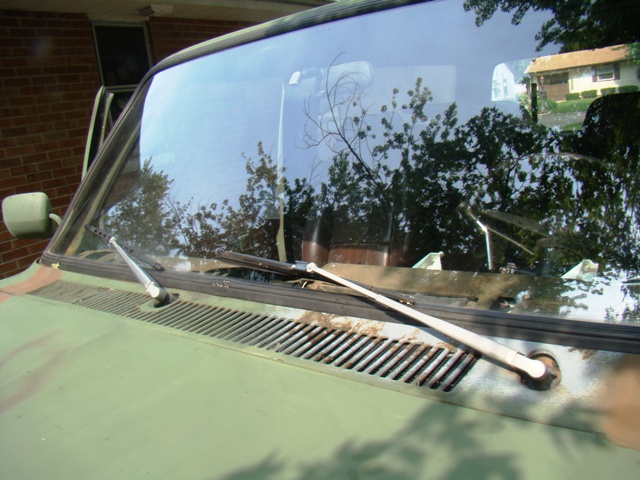
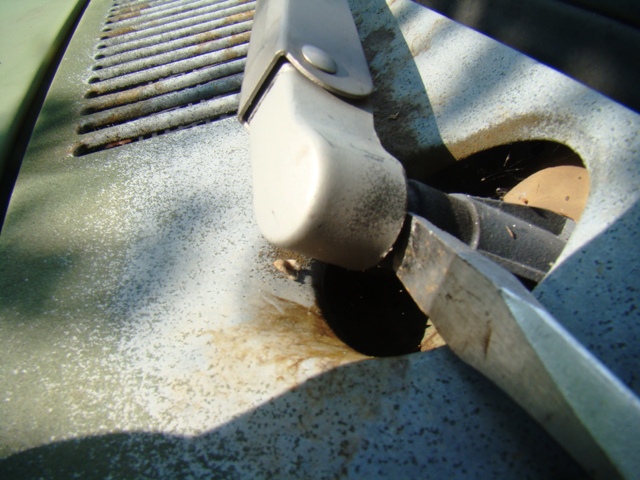
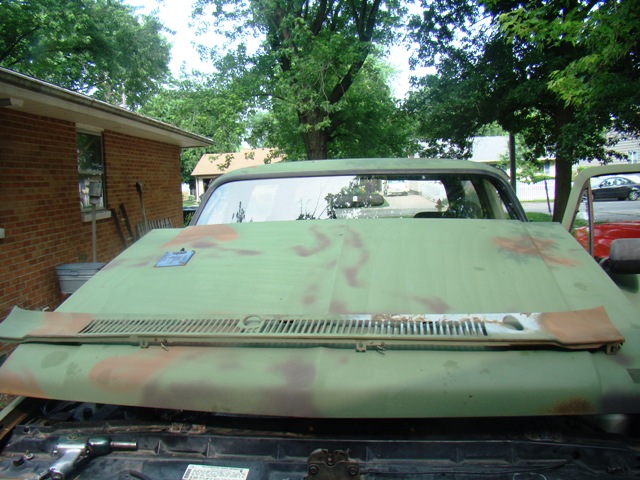
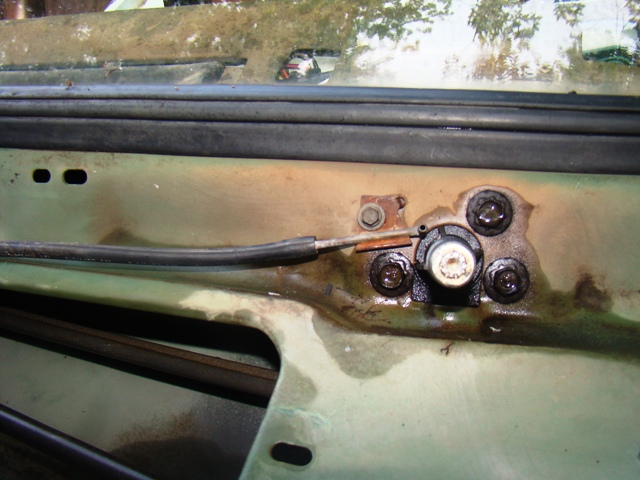
Here are the (stock) crappy wipers with the washer nozzle poking through the cowl vents.
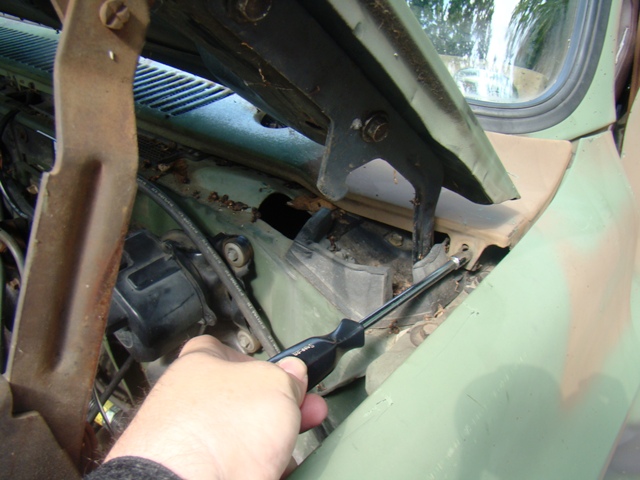
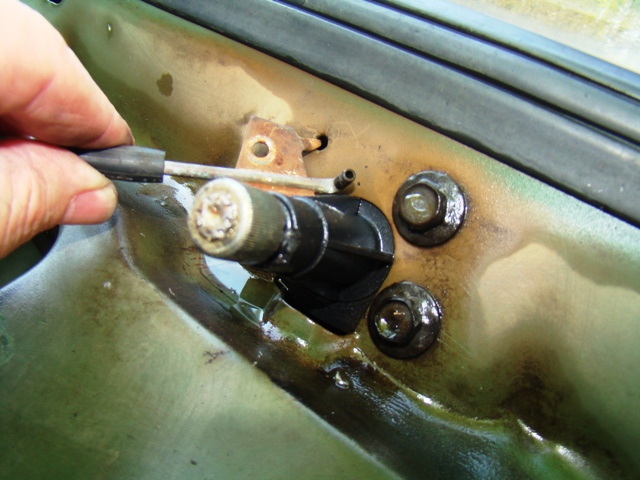
This is the wiper arm release clip that will need to be released by a pick.
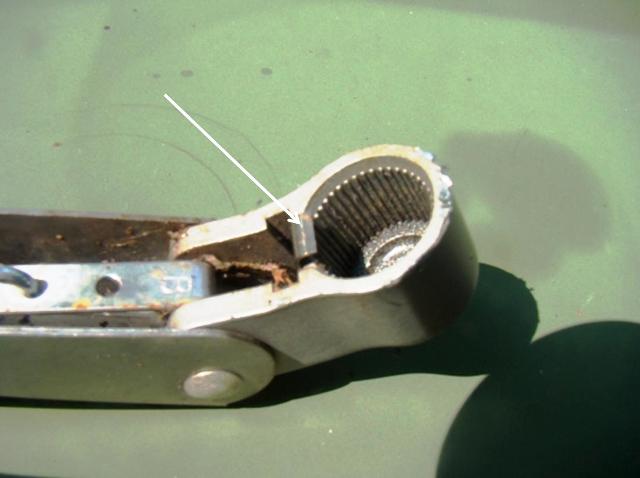
See the clip in the mirror being released by the pick
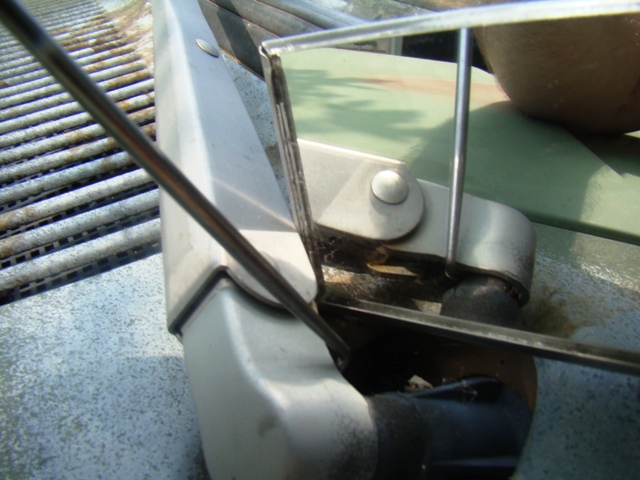
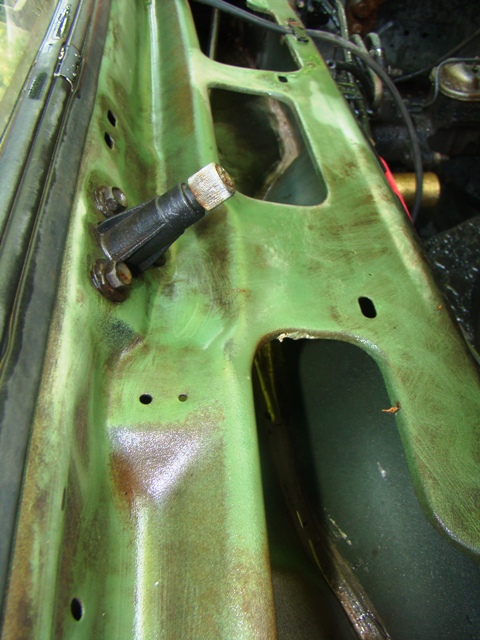
You will need to pry the arm base away from the shaft with a large screw driver.
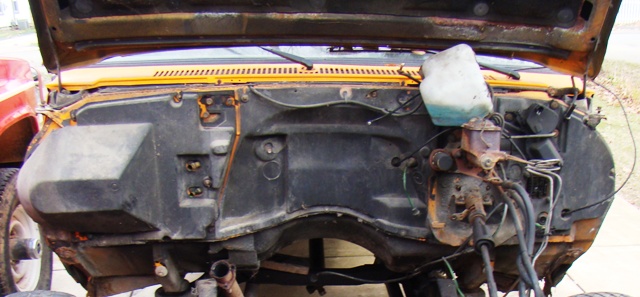
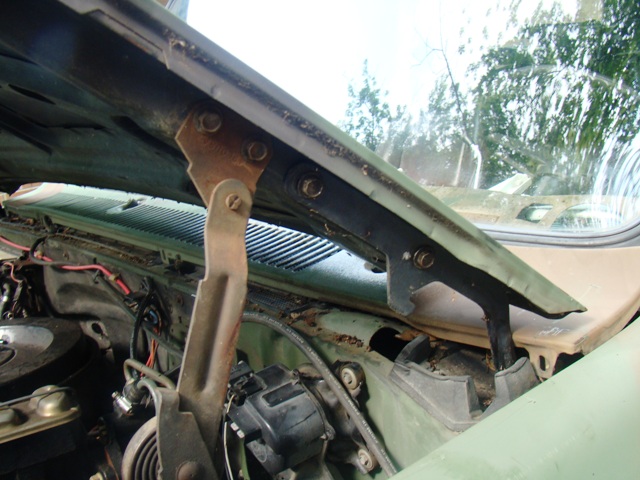
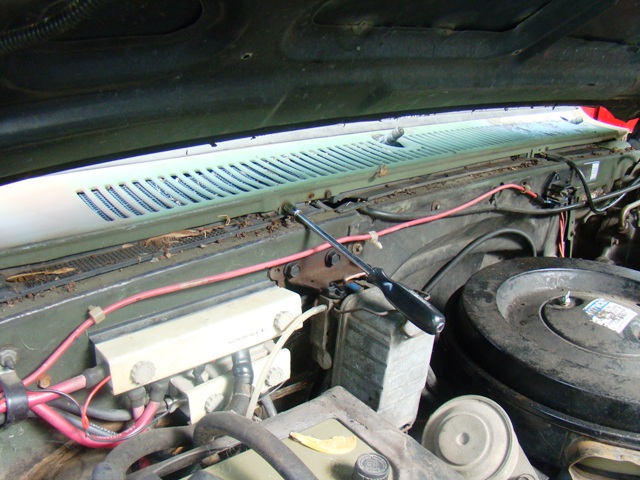
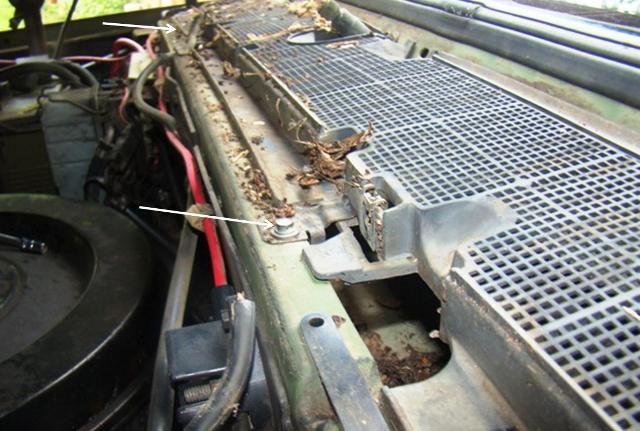
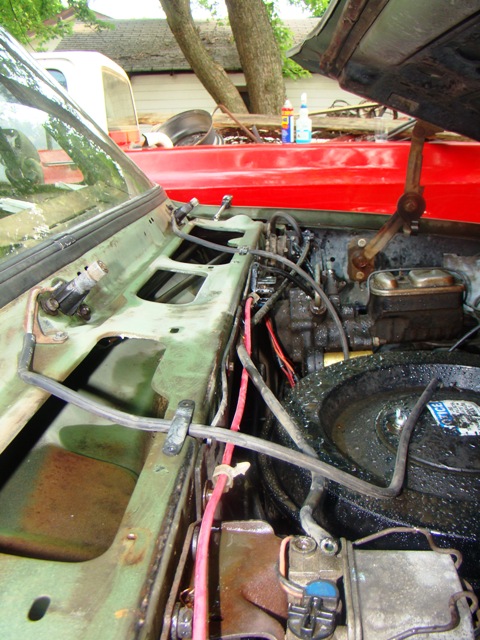
Now loosen the front hood hinge bolts and remove the rear bolts entirely to allow the hood to pivot forward and gain access for the cowl panel to be removed without interference of the rear of the hood. (you can remove the hood entirely if so desired)
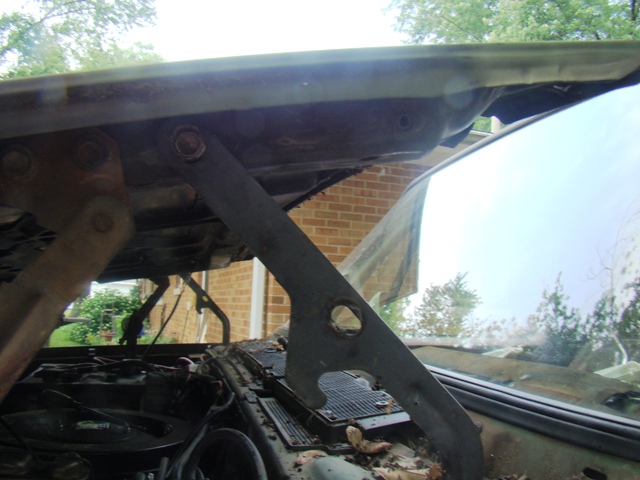
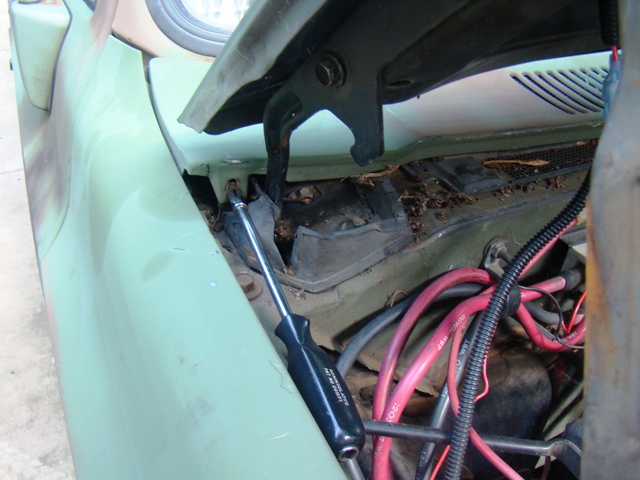
With the hood now tilted forward remove the three cowl mounting bolt (9/32 ¼”socket). There are pins that go into the body at the rear of the cowl to secure it to the body, so lift up on the front of the panel and it will lift out at an angle.
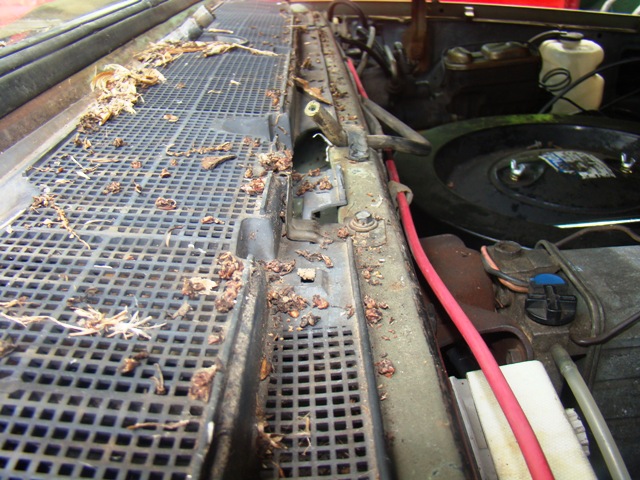
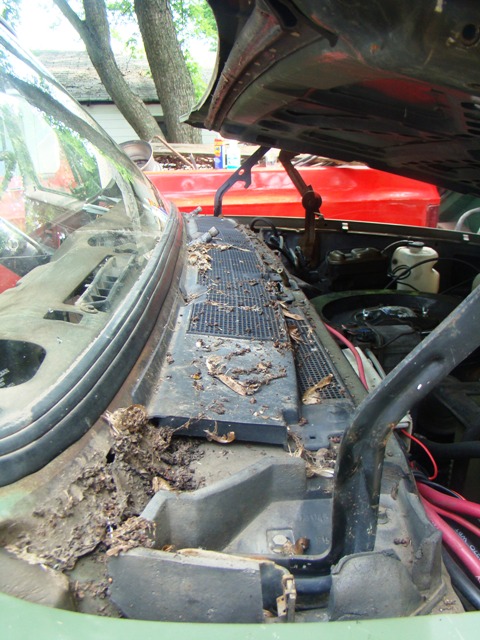
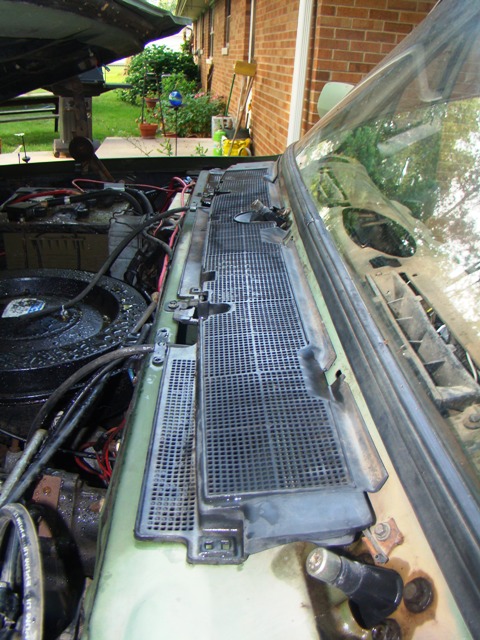
Next remove the two cowl screen bolts and the cowl screen. This will be a perfect time to clean all the debris that has collected in the wiper linkage area and under the cowl. As you can see mine was a mess.
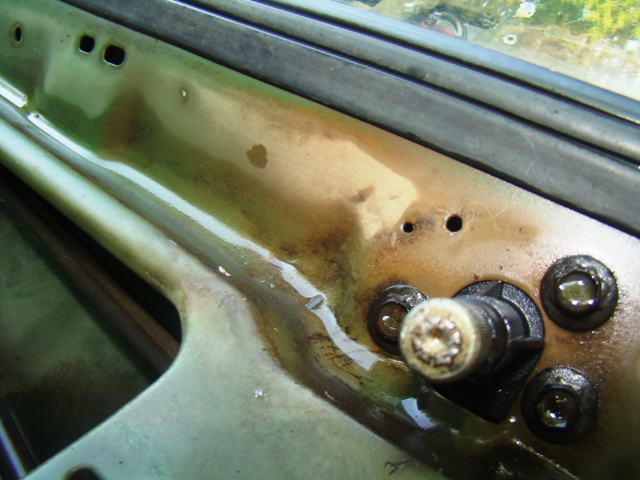
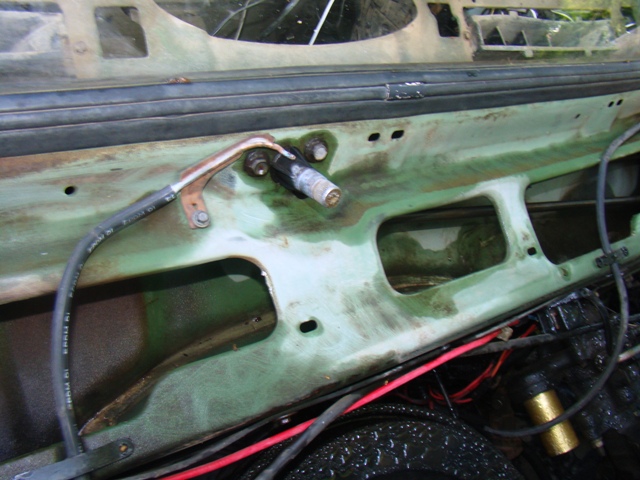
Note the existing holes to accept the newer nozzles and how they install including routing the tubing back under the retainers in the stock location.
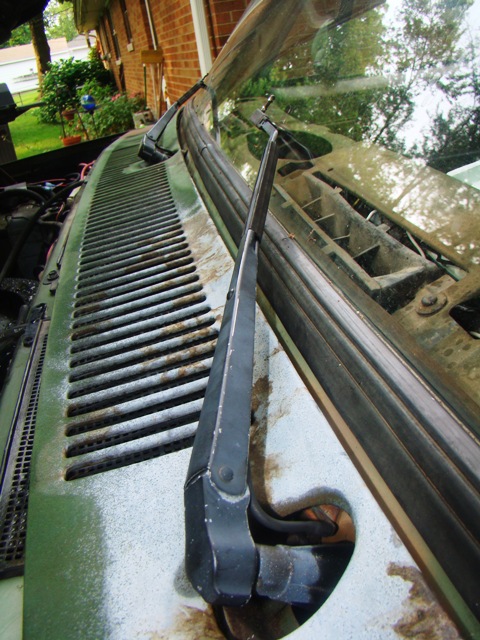
Cowl screen, cowl panel and wiper arms reinstalled after cleaning.
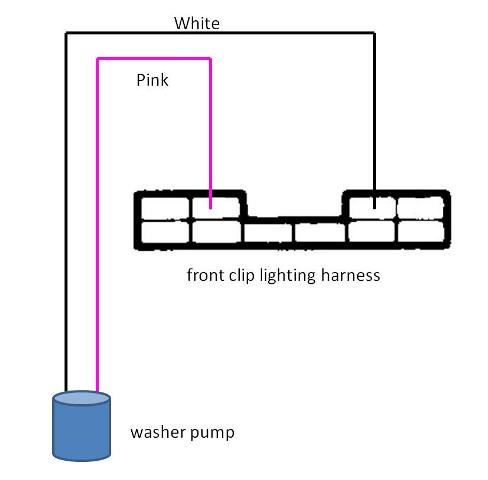
Attach the two pieces of tubing to the Y or T adapter, route the tubing on the firewall, ensuring no interference with anything, swap your washer reservoirs, and plug in or adapt your washer pump wiring.
(Note: if you are using a civilian interior harness to gain factory gauges - you will need to extract and remove the center two wires in the bulkhead connector and install the washer pump wires in their place).
I'm still using the CUCV front and rear lamp wiring harnesses, but installed the Crew Cab donor trucks interior wiring harness to obtain the intermittent wipers, all cluster gauges etc. The two wires for the washer circuit (pink and white) were removed from the donor headlamp harness by inserting a terminal removal tool (small screwdriver will also work) into the terminal end of the bulk head harness connector to release the terminals. I then had to remove the brown w/white stripe and black w/yellow stripe (blackout lamp) terminals to replace with the washer circuit.
(8-22-11)
Update to wiring the washer pump into the circuit...
I'm still using the CUCV front and rear lamp wiring harnesses, but installed the
Crew Cab donor trucks interior wiring harness to obtain the intermittent wipers,
all cluster gauges etc. The two wires for the washer circuit (pink and white)
were removed from the donor harness by inserting a terminal removal tool (small
screwdriver will also work) into the terminal end of the bulk head harness
connector to release the terminals. I then had to remove the brown w/white
stripe and black w/yellow stripe (blackout lamp) terminals to replace with the
washer pump circuit.
Upon reinstalling the harness I did not have washers yet (quick test of pump
checked good) so I removed the wiper delay module mounted to the column and
reconnected the harness without the module. Washers worked so I must have a bad
module. I also swapped the wiper motors as the factory CUCV wiper motor would
not operate in the intermittent mode. Found my spare module and swapped it
in...works better but not as fast as I desired. Guess I'm too used to the GMT400
Yukon and GMT800 Suburban’s performance, but the washers are much better for
sure.
I'll update the wiring install picture into the bulkhead when I can get to my
home hard drive...I'm away on Military Duty until Sep 16th.
Finished removing the exterior lighting & horn override/black out lamp harness
from the CUCV interior harness and next plan is to get it modified back into the
Civy donor harness from the crewcab.
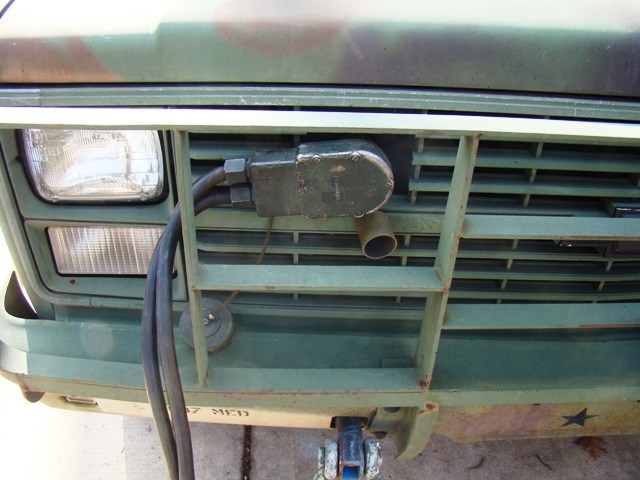
This is a cool feature on the CUCVs.
With the flip of a switch all the exterior lamps and the horn no longer will
work and give your position away in a tactical environment. Flip the switch down
and blackout front and rear bumper lamps come on which helps your spacing in a
convoy during night driving Ops. Flip the other B/O switch and a hooded headlamp
keeps you from being seen from the air but gives you enough downward lighting
from a single b/o headlamp that you can still travel.
(Labor Day Wknd 3-5 Sep 11)
Had the interior harness in and out a few times trying to get the B/O wiring
installed correctly.
I'm at a stand still until I can review the 87 crew wiring diagrams a little
more closely along with the CUCV. I carefully extracted the Packard terminals
from the CUCV bulk head and fuse box to reinstall in the Civy's and I have a
couple circuits installed incorrectly.
Service lamps all work but I lost brake lights, the left T/S and flashers honks
the horn continuously, right T/S activates the buzzer continuously and the horn
button does nothing.
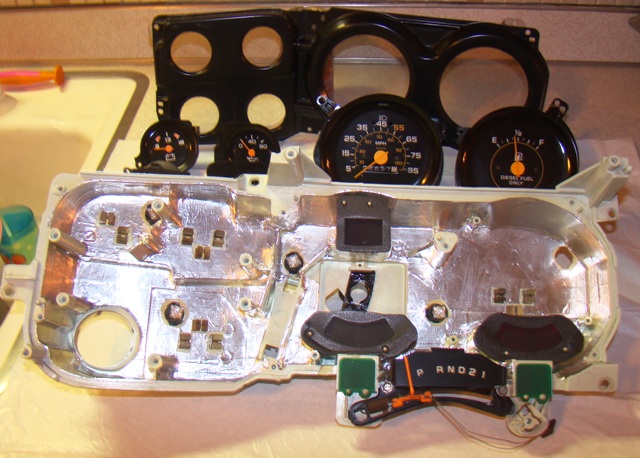
I also disassembled the cluster and lined the entire housing and the cluster
cover with 3M aluminum tape for reflection purposes for the red back lighting
LEDs. I also installed the lighter socket and the fiber optics to the ash tray
and installed some corner Kicker dash speakers I got on the
http://chevyk5blazer.com for sale section.
I would like to find a good factory Delco ETS AM/FM radio too.
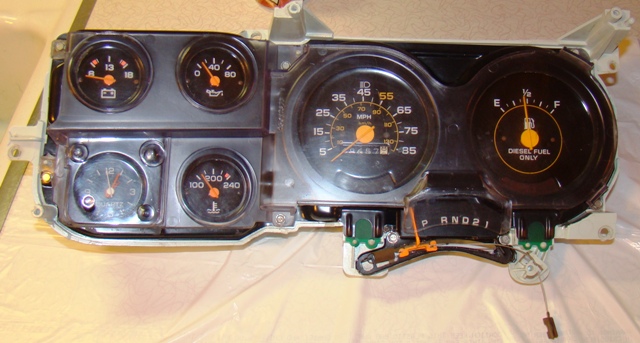
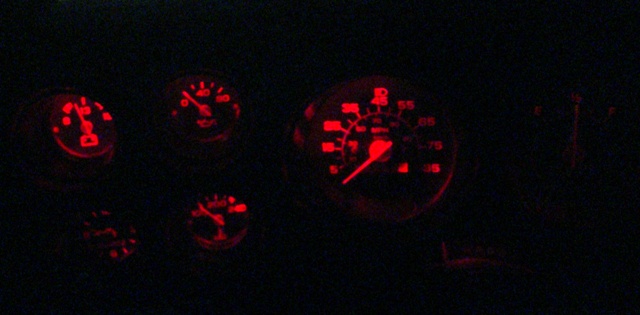
Instrument Cluster Upgrade To
Gauges and Quartz Clock and Red LED Back Lighting from 87 Chevy Crew Cab
I've seen some builds on cleanup, painting the cluster housing to brighten the gauge back lighting but took a different approach.
I disassembled the cluster and lined the entire housing and the cluster cover with 3M aluminum tape for reflection purposes.
I then ordered and received some WLED-x5 red LEDs from http://superbrightleds.com to re-bulb the cluster, heater and 4WD Shifter Console back lighting to a more tactical look much like the M-35s and M-923 series Military Vehicles.
(10-28-11)
Took several attempts to get the wiring correct but I finally got it figured out
and have the blackout lamp circuit installed into the factory fuse box (no bubba
splices) My last attempt had me puzzled for a while...left turn signal constant
horn, right turn signal & hazards constant seat belt buzzer no service lights,
brake lights, or horn
Installed the harness back in today got it all buttoned up and now no gauges or
4wd light
Had to get away from it for a while so I removed the grille to access the horn.
I removed the dual horn wiring from my donor front harness and swapped it with
the single horn wire in the CUCV harness. Had an extra horn and works as it
should but turns out they are both "F" note horns so I need to go to the pick n
pull and get a different note for the factory dual horn option. I also installed
some bling from a parting out purchase over on the 67-72 site. It was the chrome
and gold bow tie and that isn't quite tactical so hit it with the wire wheel to
scuff it up and shot it with a few coats of flat black.

(6-23-12)
Been a while since I made an update but I started working on the CUCV again over
the last month. I got another set of dual Horns with the "A" and the "F" notes
so I swapped in the "A" note behind the NATO plug and the horns sound 100%
better.
I actually had the cluster installed and kept blowing gauge fuses so I thought I
might have crossed or shorted a wire and ended up pulling the wire harness again
for the umpteenth time;( turns out I had got a little sloppy with the foil tape
and was shorting some circuits causing the fuse to blow.
(5-1-20)
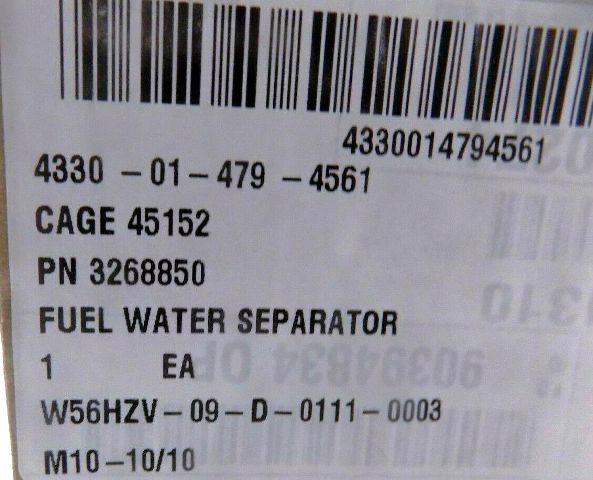
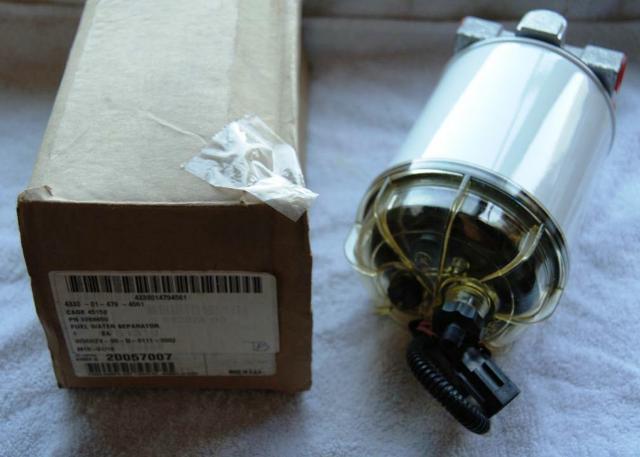
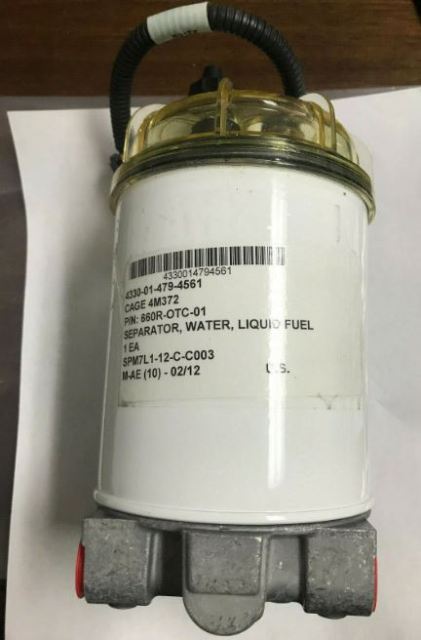
Model 80 Stanadyne (box) Filter Base Upgrade to Oshkosh MTRV MK23 7 Ton Filter
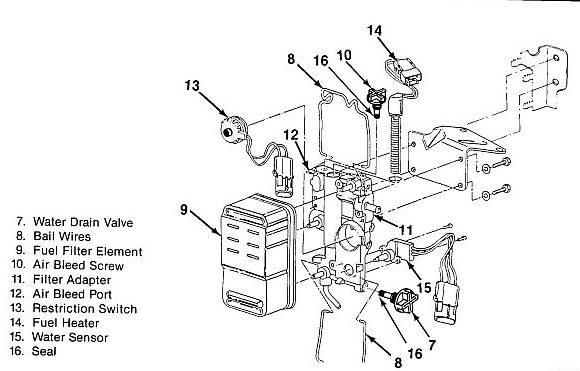
to
Parker Racor 660R-OTC-01 3268850 Fuel Filter Fuel/Water Separator purchased from surplus on eBay
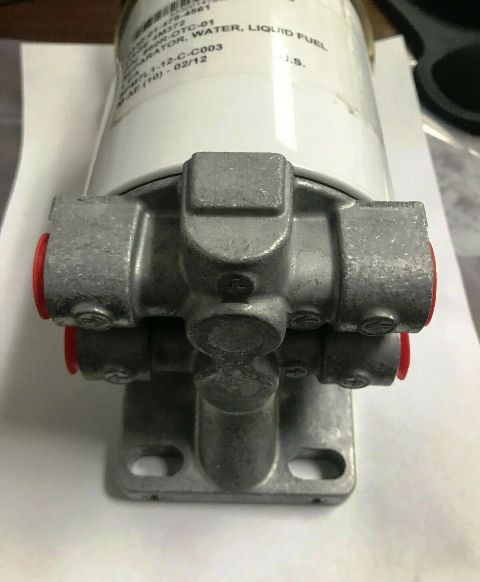

Parts Needed:
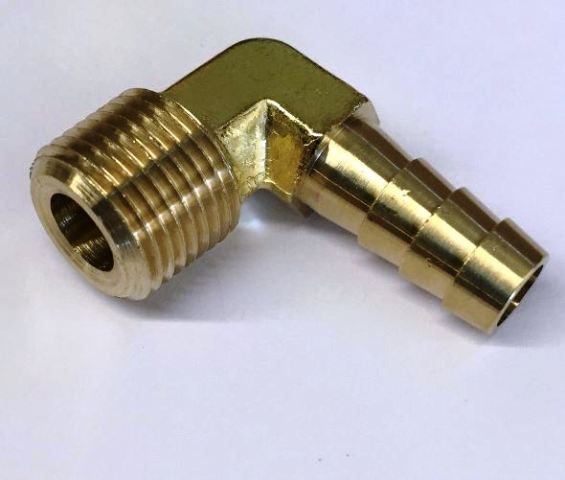
3/8" NPT - 3/8" Barb Fitting
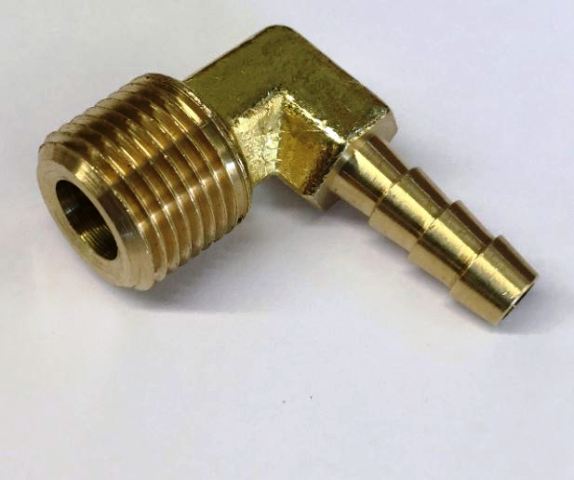
3/8" NPT - 1/4" Barb Fitting
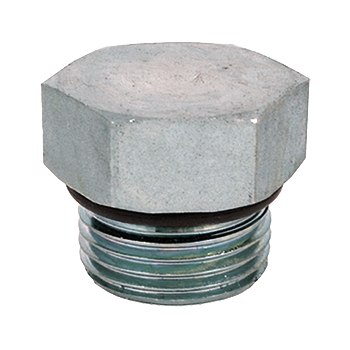
SAE 8 ORB Pipe Plugs (two required)
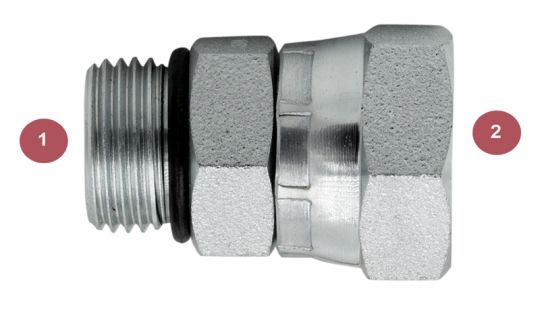
SAE 8 ORB to 3/8" Swivel (two required)
3/8" Fuel Hose with clamps
1/4" Fuel Hose with clamps
Mounting hardware - I used a couple Carriage Bolts I had on hand.

Installed
Rear Power Window Switch
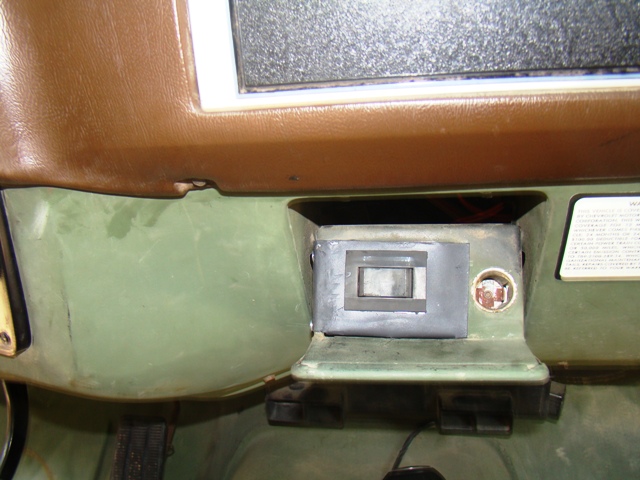
Stealth Rear Power Window Switch hidden in the ash tray...
Harness preliminarily ran from engine compartment to tailgate, rear window regulator and not yet installed...more to come.
Head Liner Trim Upgrade
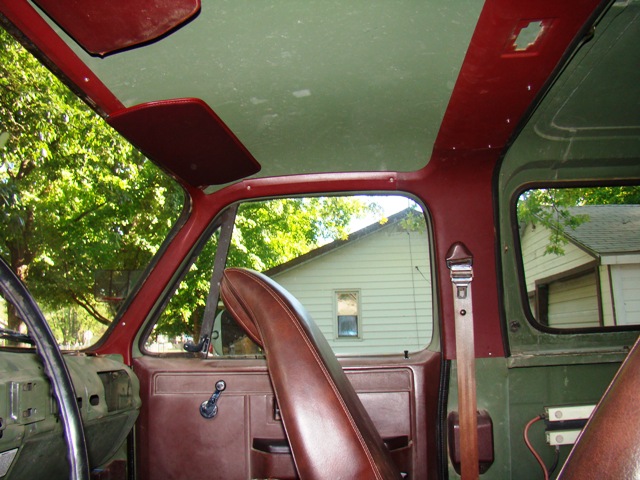

Head Liner Trim installed, headliner not yet covered, also have a dome lamp to install but toying with something more Military...
Also have rear bed panel cut from 1/4 fiber board but not yet covered...pattern templates supplied from http://chevyk5blazer.com
Reese Receiver Hitch Upgrade
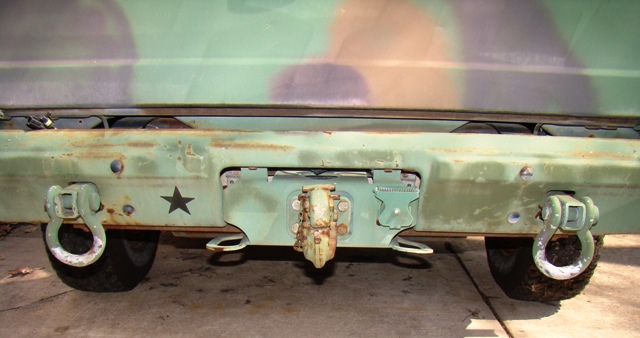
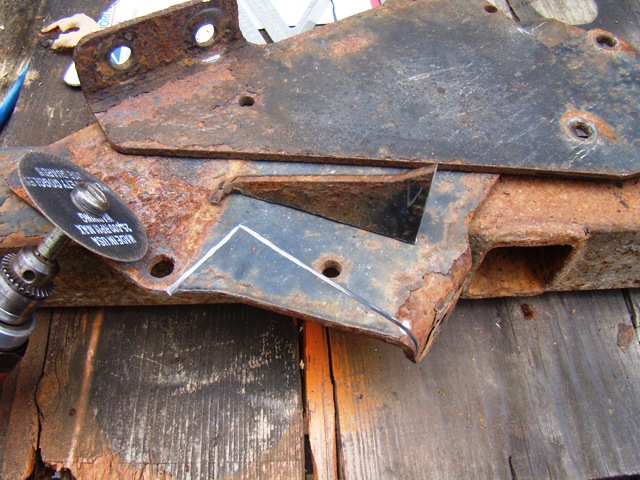
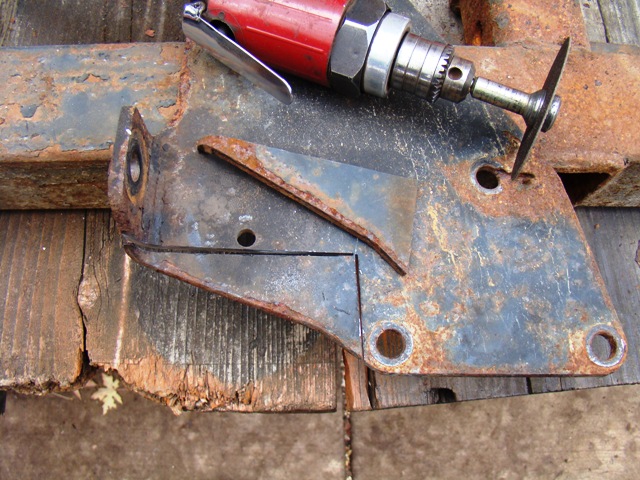
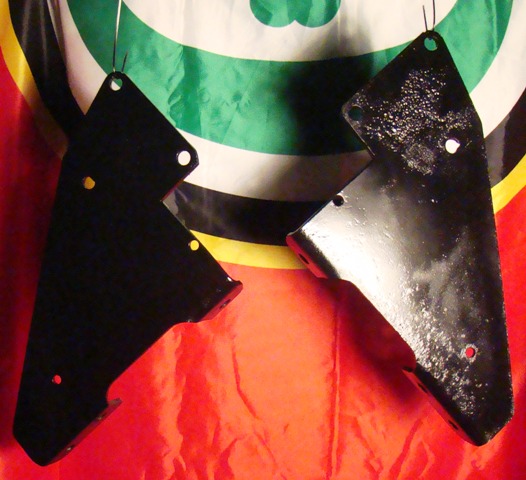
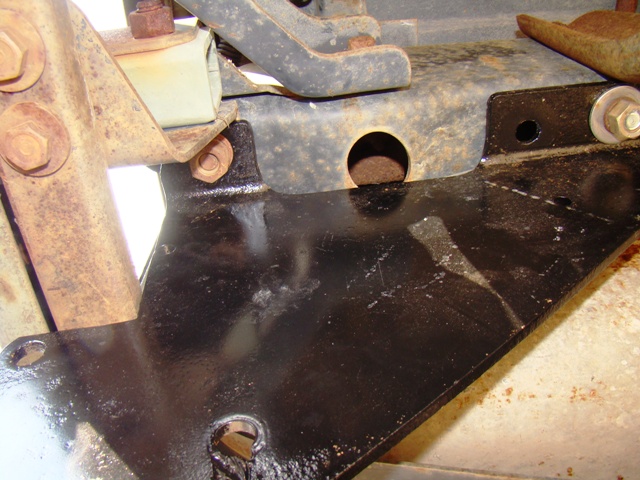
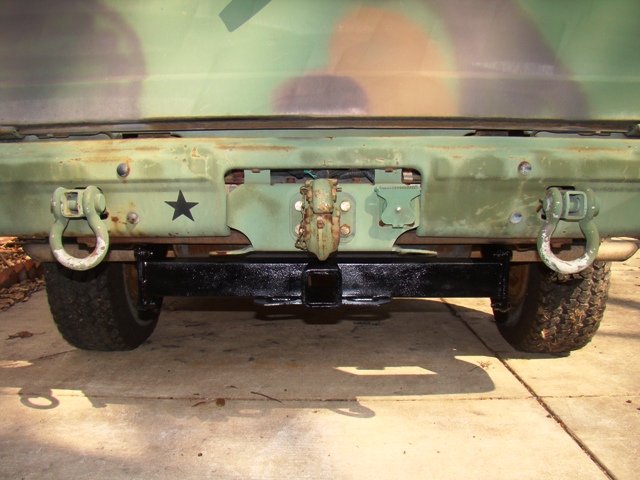
Reese 2" Receiver Hitch - had to notch the side frame mounts to clear the CUCV Pintle Hitch reinforcement cross member
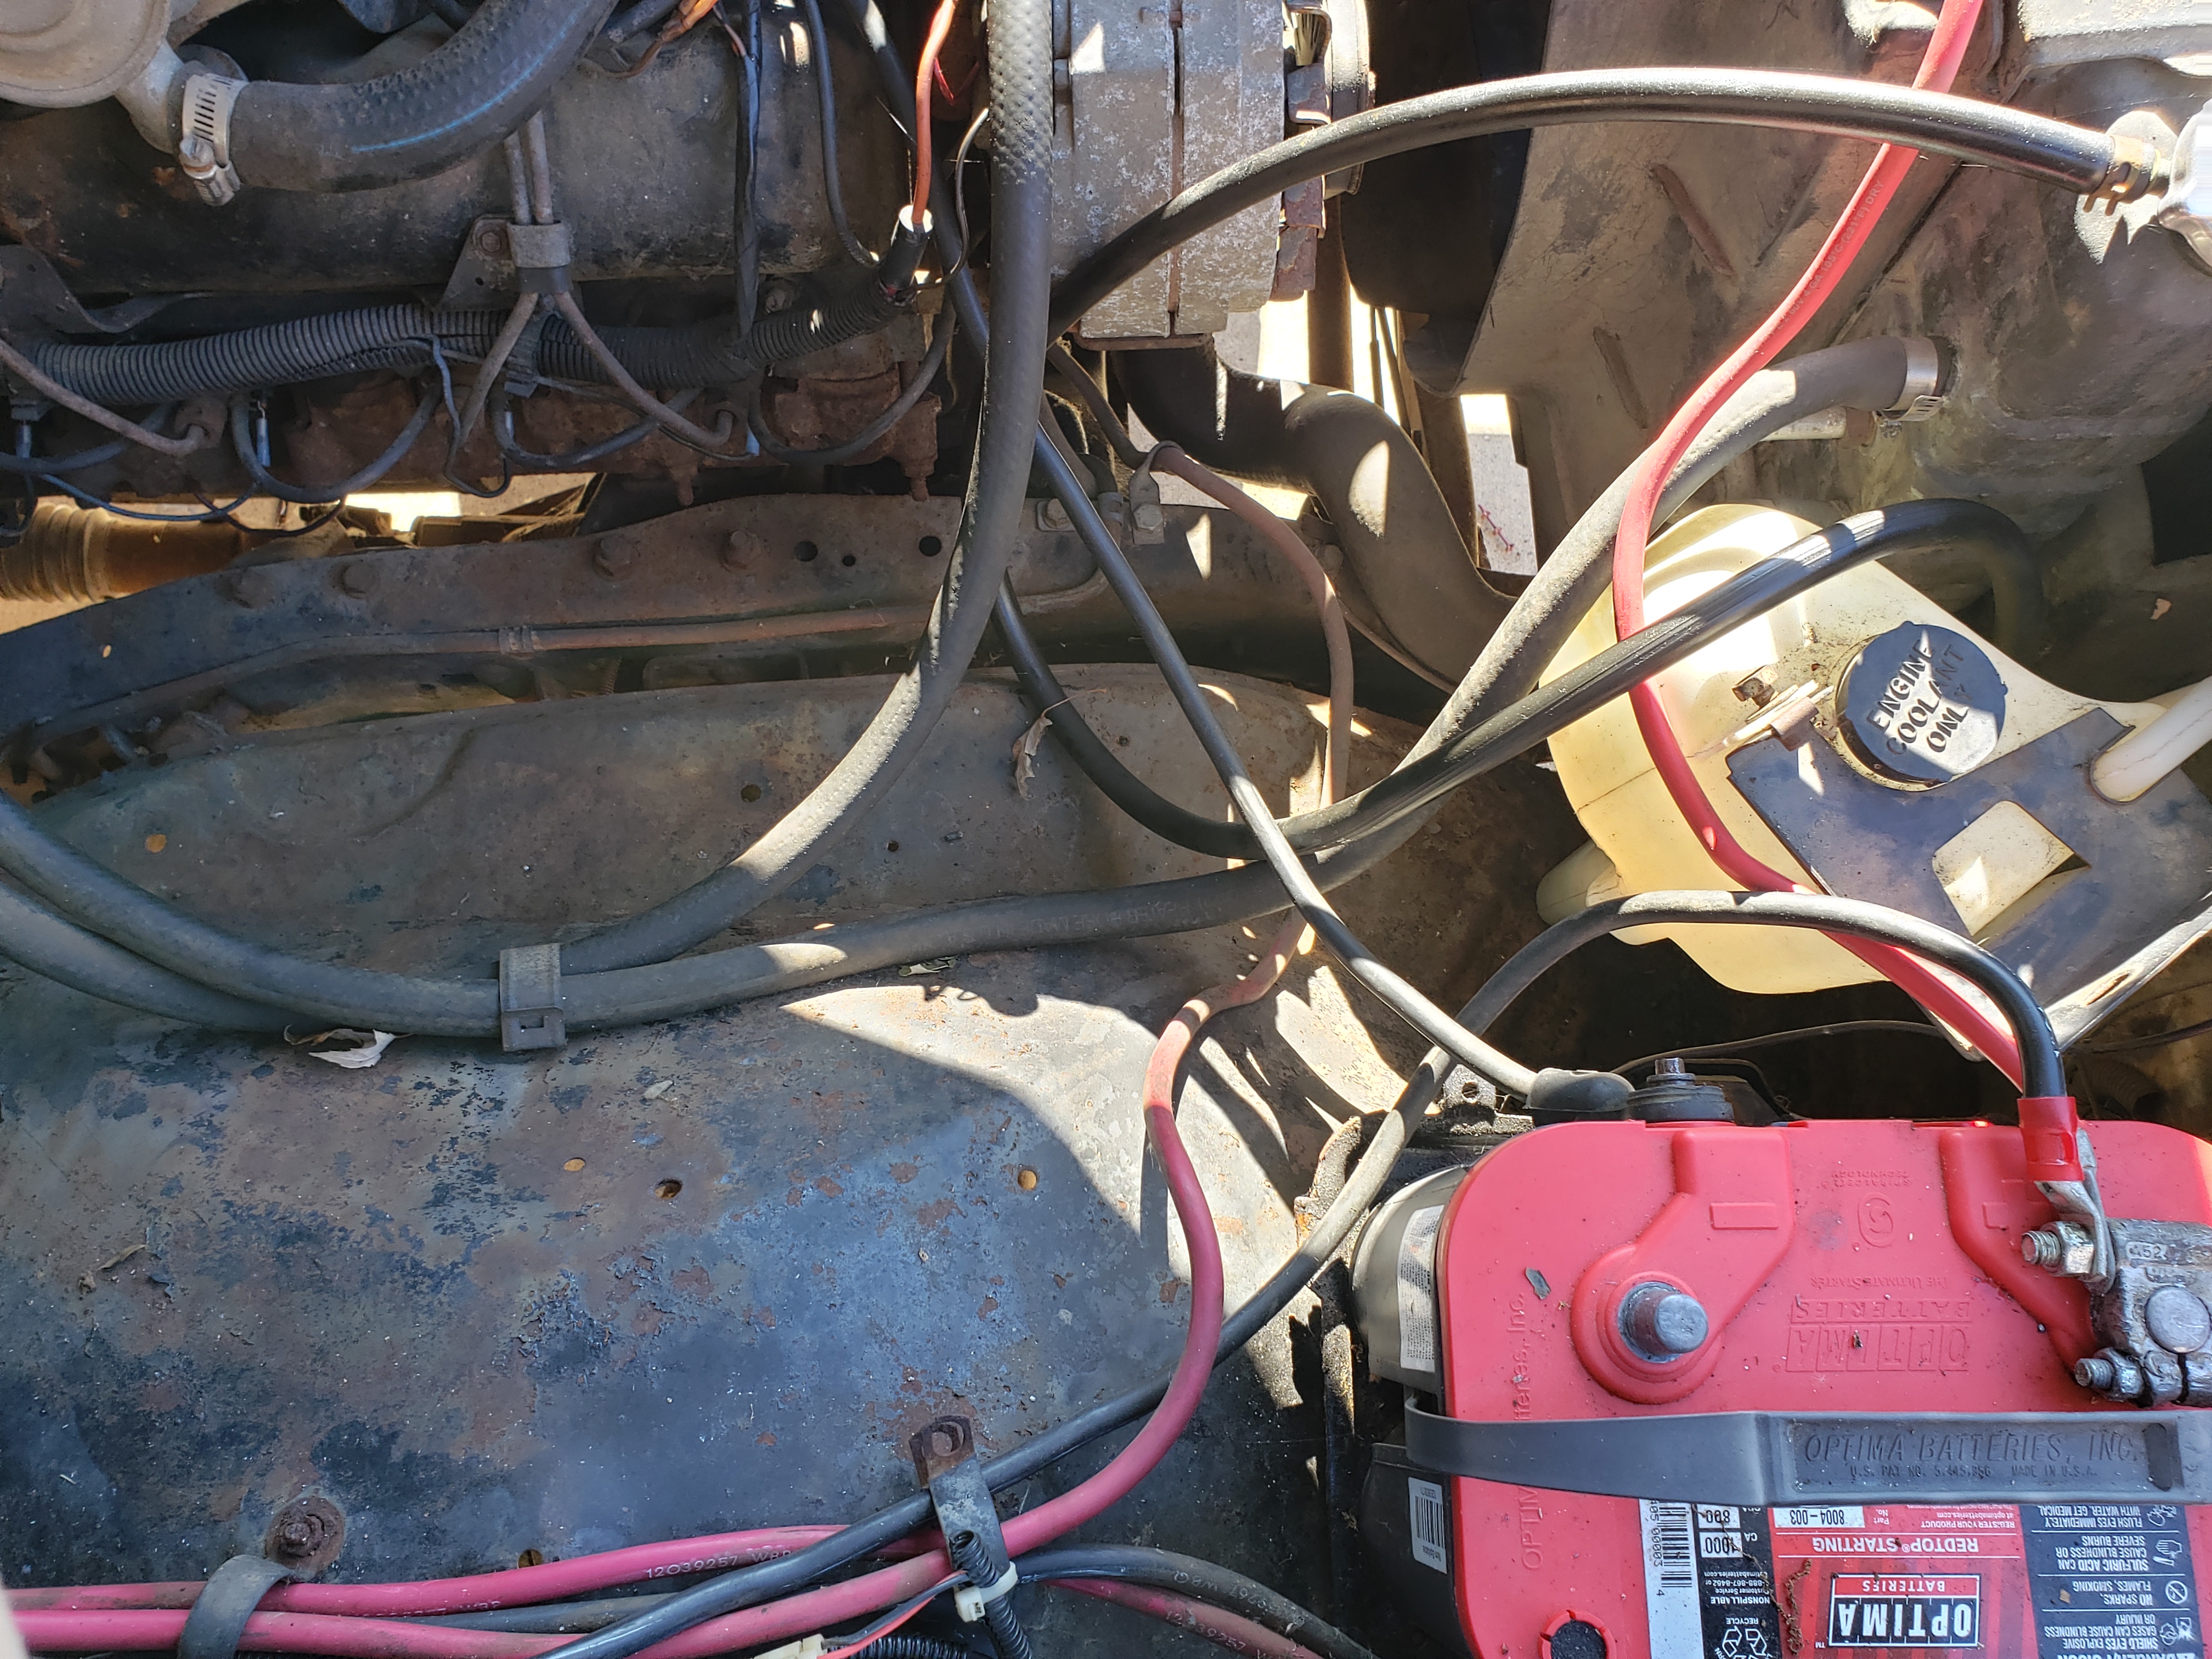
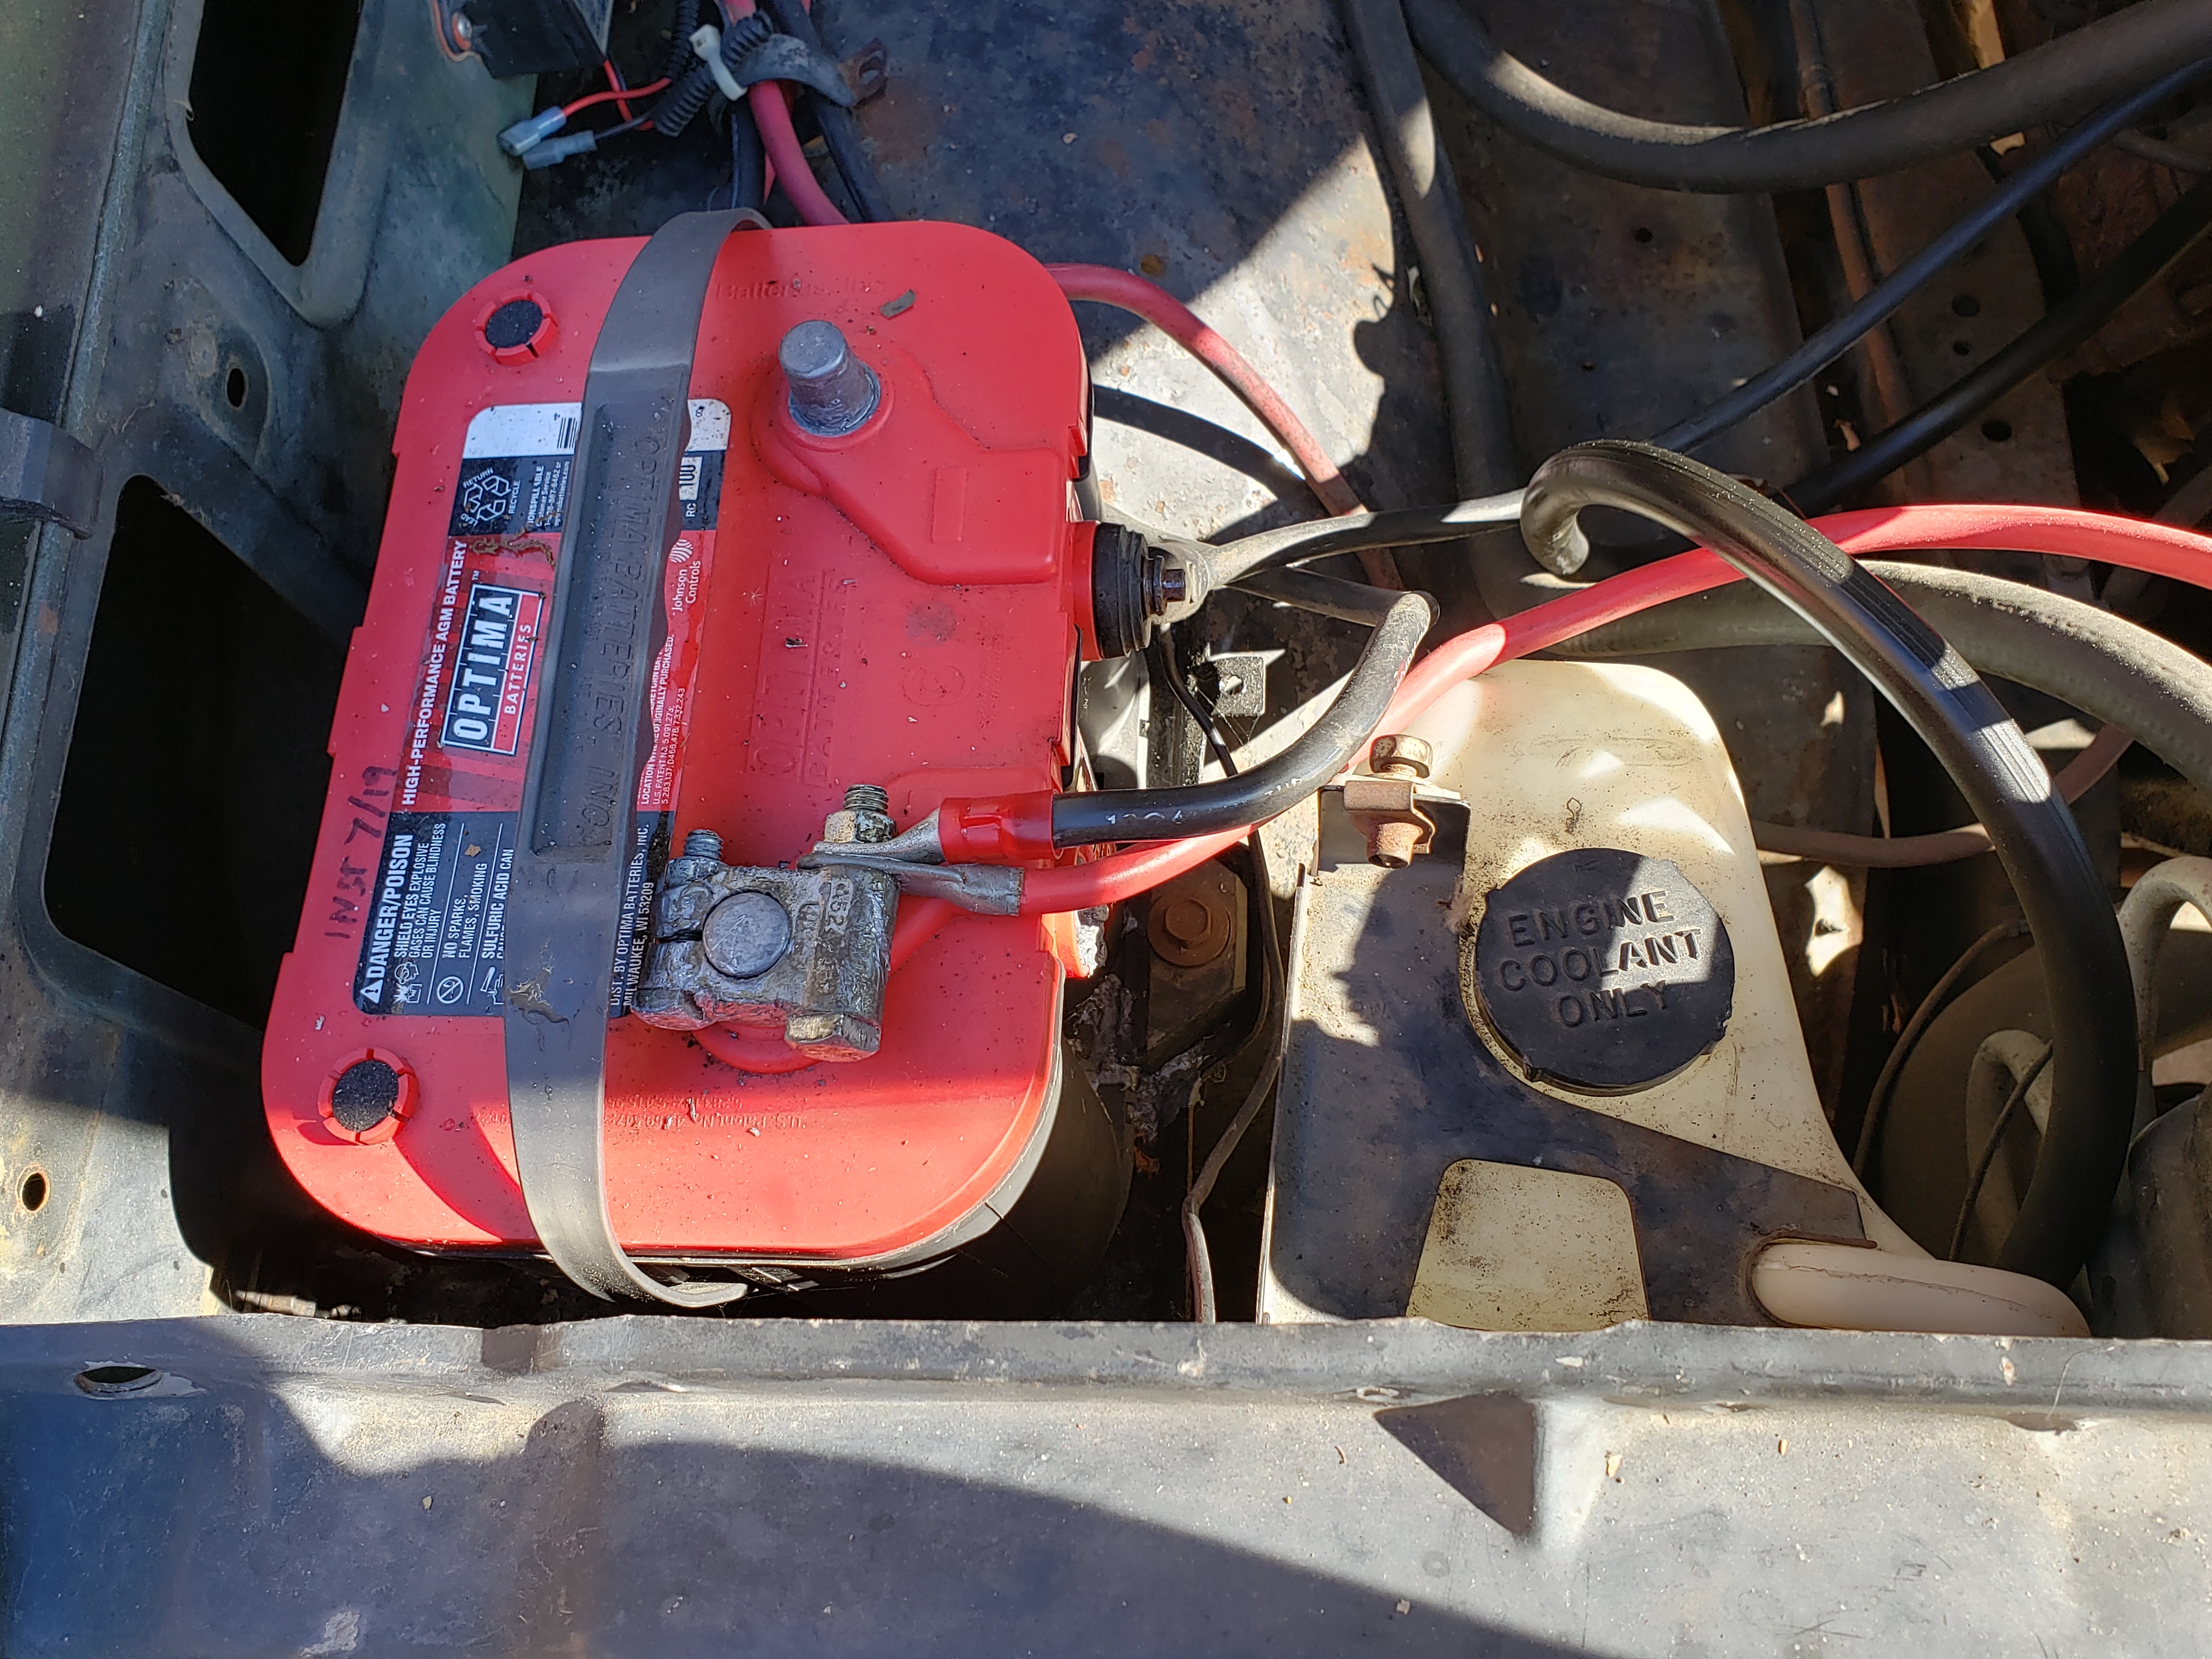
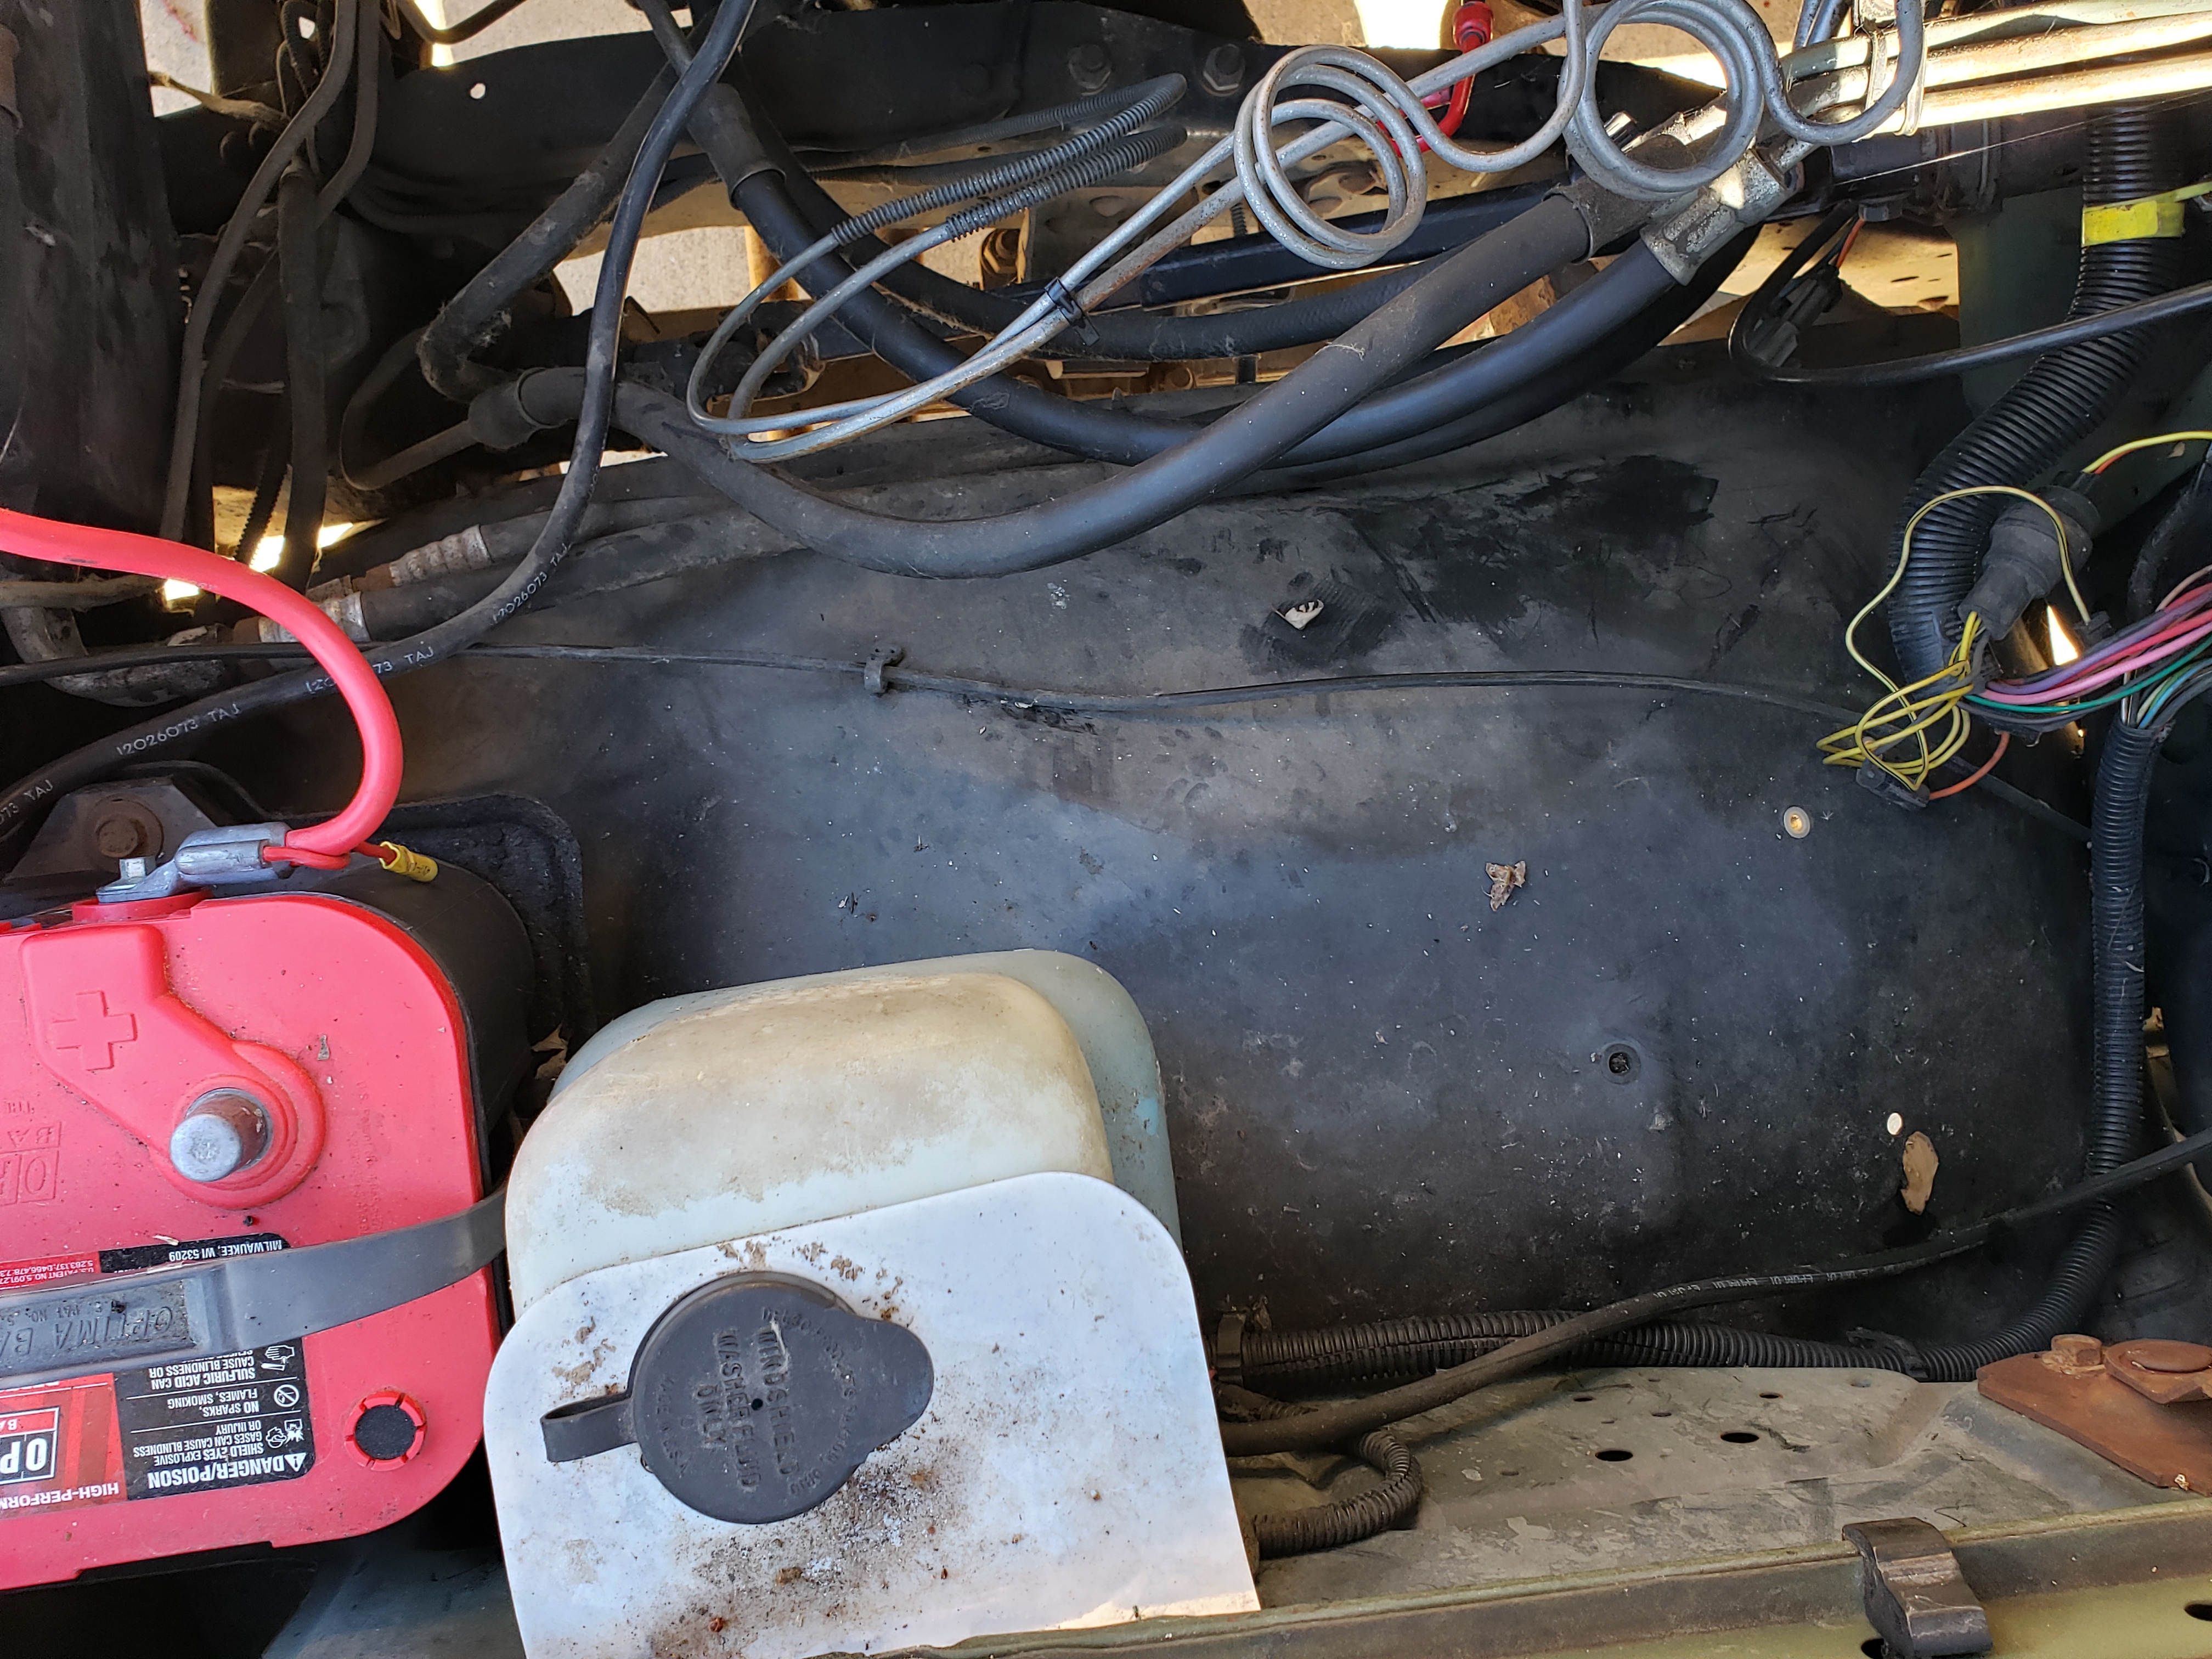
Civilian GM Dual Batteries Upgrade and NATO Jumper Cables
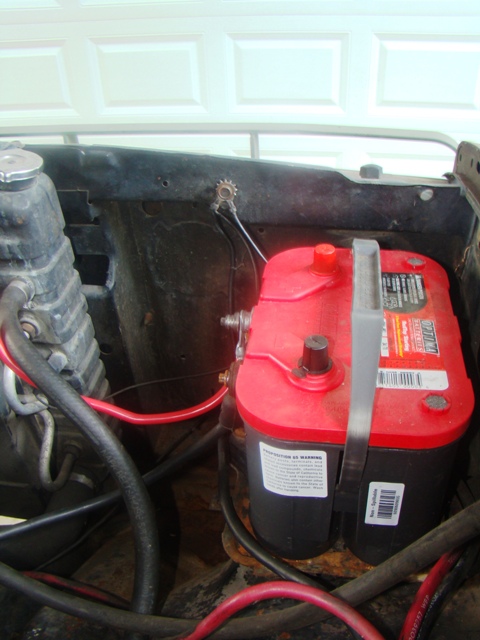

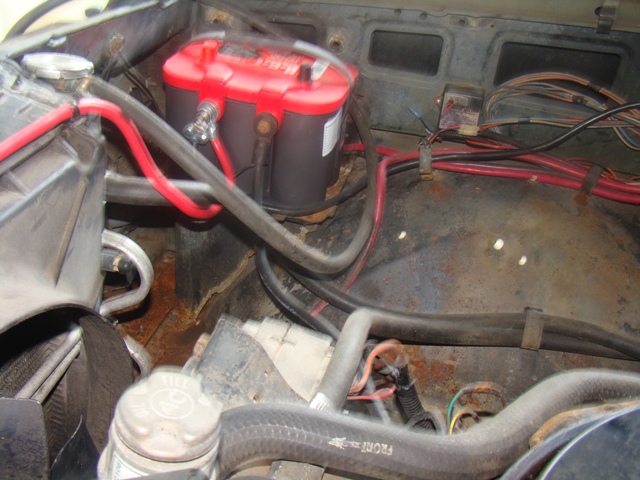
Removed the stock CUCV 6N Battery Brackets and installed dual GM Civy Truck Battery Brackets

19 feet long (need jumper cable ends installed)
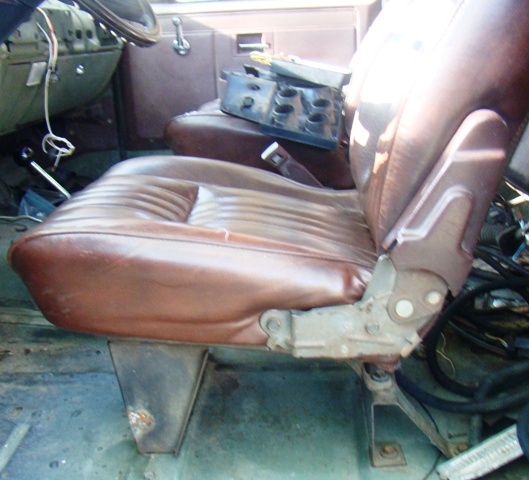
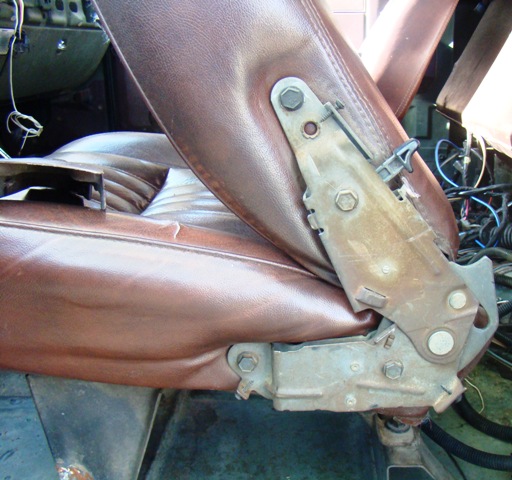
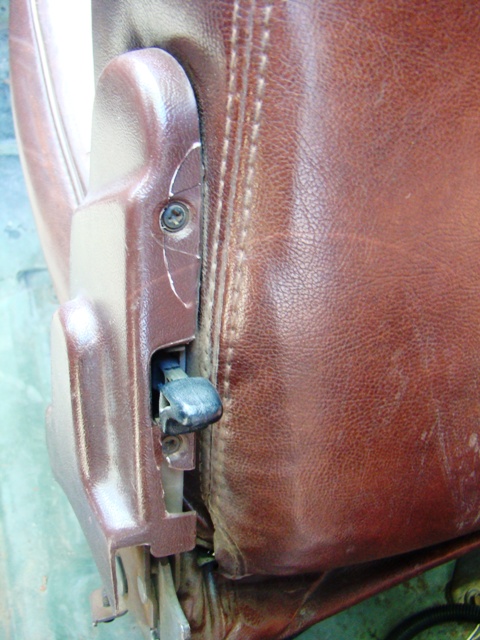
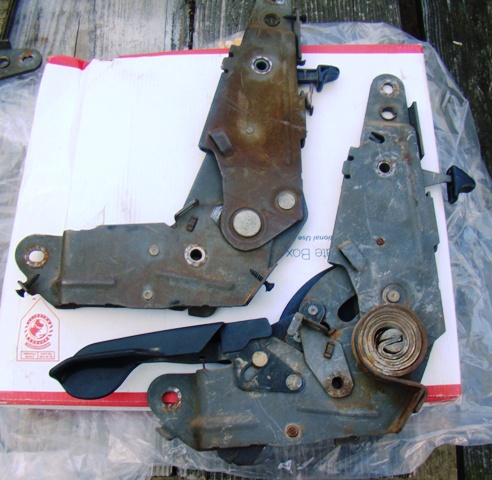
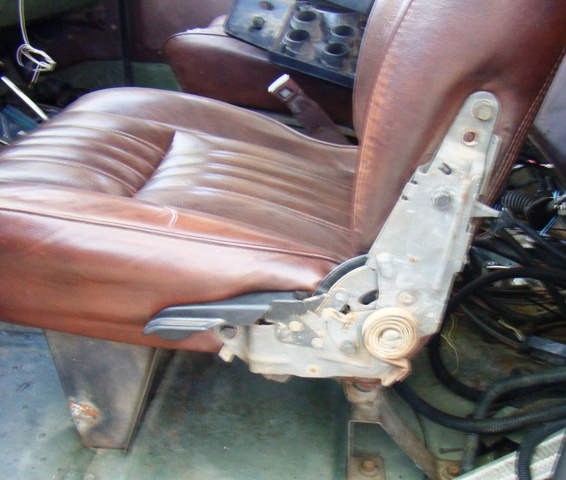
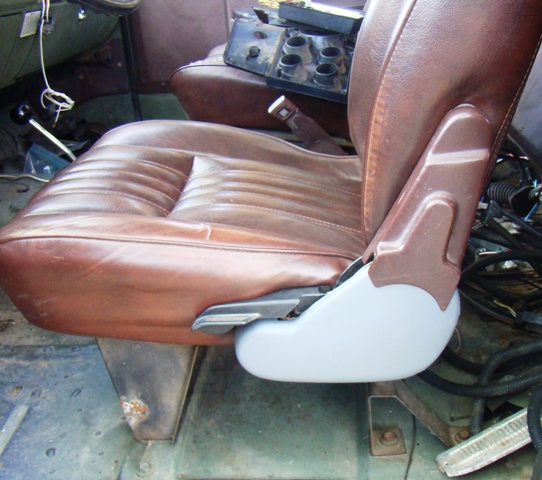
Reclining Seats Upgrade from 82-92 Camaro's and Firebird's


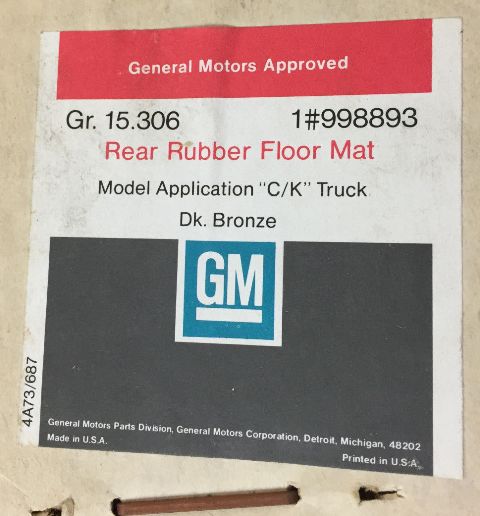
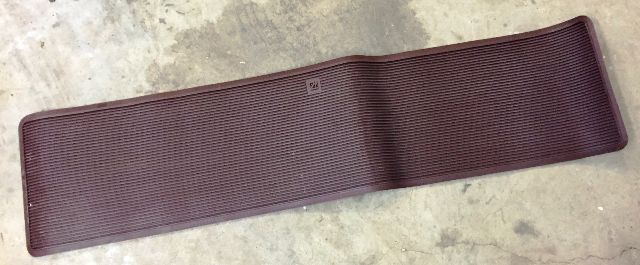
NOS Rear Floor Mat, GM # 998893 "85-87 C-K Truck - Dark Bronze
(10-9-20)
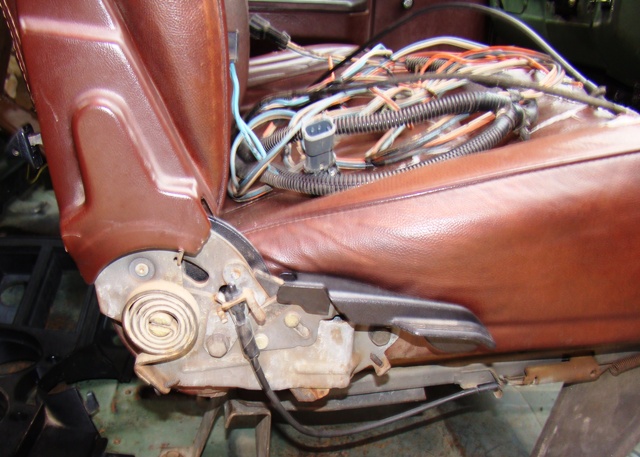
1988 K5 Blazer Seat Upgrade
Installed seats from a donor Blazer I purchased.
I had to swap the seats to the CUCV bases as the Civy bases did not align with the bolt holes in the CUCV floor.


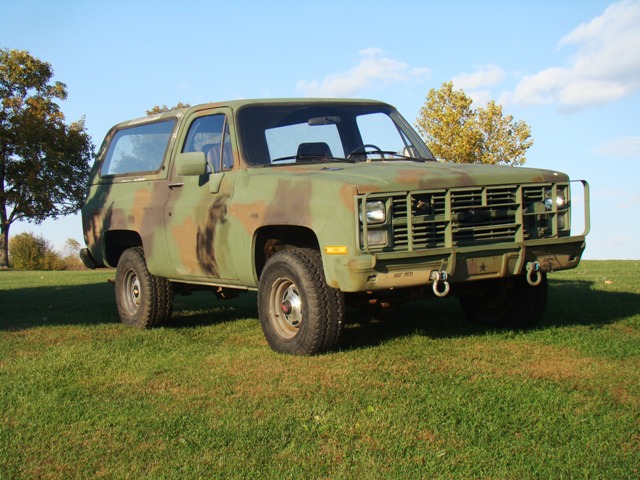
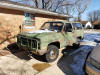
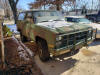
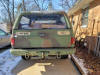
Did not realize I really do not have any complete body pictures other then the one in the drive with snow when I first brought it home so I went to the park to take a few good shots of it.
1985 M1009 CUCV 48000 miles – Clean Illinois Title - came from an Army Reserve or Guard Medical Unit at Ft Carson Colorado
Project Milverado
My end goal was to install as many factory civilian options as I could while retaining the outside appearance of a Stock M1009 CUCV so in essence a sleeper Military Silverado or Milverado if you will...
Factory Installed Option - Mods:
All 24v starting components eliminated
1. Civilian GM Truck Battery Mounts installed two red top Optima’s (NATO plug still functional as 12v)
2. Civilian 87 6.2 Diesel Crew Cab engine harness and dash harness
a. Gaining factory Oil, Water, Volt Gauges, Cigar Liter with Ash Tray Lamp.
i. Cluster Bulbs, 4wd Floor Shifter Lamp upgraded to Red LEDs and cluster housing lined with 3M reflective foil tape.
ii. Painstakingly installed the Blackout Lamp circuit terminals into the Civy harness and fuze block (no cut wires or spices)
iii. Tilt Wheel w/ Intermittent Wipers, upgraded Washer Pump/Wiper arms and spray nozzles and Cruise Control button)
iv. Dual Factory Horns
v. Delco AM/FM Delco radio with Kicker 4” dash and rear speakers.
vi. New Correct “Brown” GM dash pad
vii. Seats are ok but getting cracks in the vinyl as they age.
3. Silverado Interior Trim and Headliner (Headliner not yet recovered) (Rear Bed Panels cut from fiberboard but not yet covered)
4. 2” Reese Receiver Hitch (CUCV pintle hitch still retained)
5. Factory FM Truck - Dog Dish Hub Caps (plan was to custom powder coat these and black them out)
6. Seat Recliners
Negotiable items not yet installed:
1.NATO Jumper CablesSOLD2. Silverado K5 Blazer - Red Velour Front and Rear Seats (included)
3. Power Windows and Door Locks including all wiring and hardware (included)
4.Correct GM Brown Door Panels for Pwr Windows and Door LocksSOLD5. Power Rear Tail Gate Window wiring and hardware (included)
6. Civilian Hard Top with Smokes Glass and Tinted Front Door GlassSOLD
7. 6” Skyjacker Suspension Lift with Raised Steering ArmSOLD8. 35” BF Goodrich All Terrain Radials
9. Cruise Control 6.2 Diesel Components, Harness, Vacuum Lines (included)
10. Factory A/C Components, Harness, and a Core Compressor (included)
11.Factory GM Truck Center ConsoleSOLD12. Hella H4 Head Lamps
13.Some but not all Factory GM Door and Tailgate seals (nothing reproduction)SOLD
14.Custom Powder Coated Matte Black Stainless Vent ShadesSOLD
15.Custom Powder Coated Matte Black Stainless “GM Option” Rock GuardsSOLD
16.Factory 4000rpm Tachometer ClusterSOLD17. NOS Factory rear seat floor mat
Additional Pics
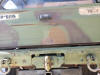
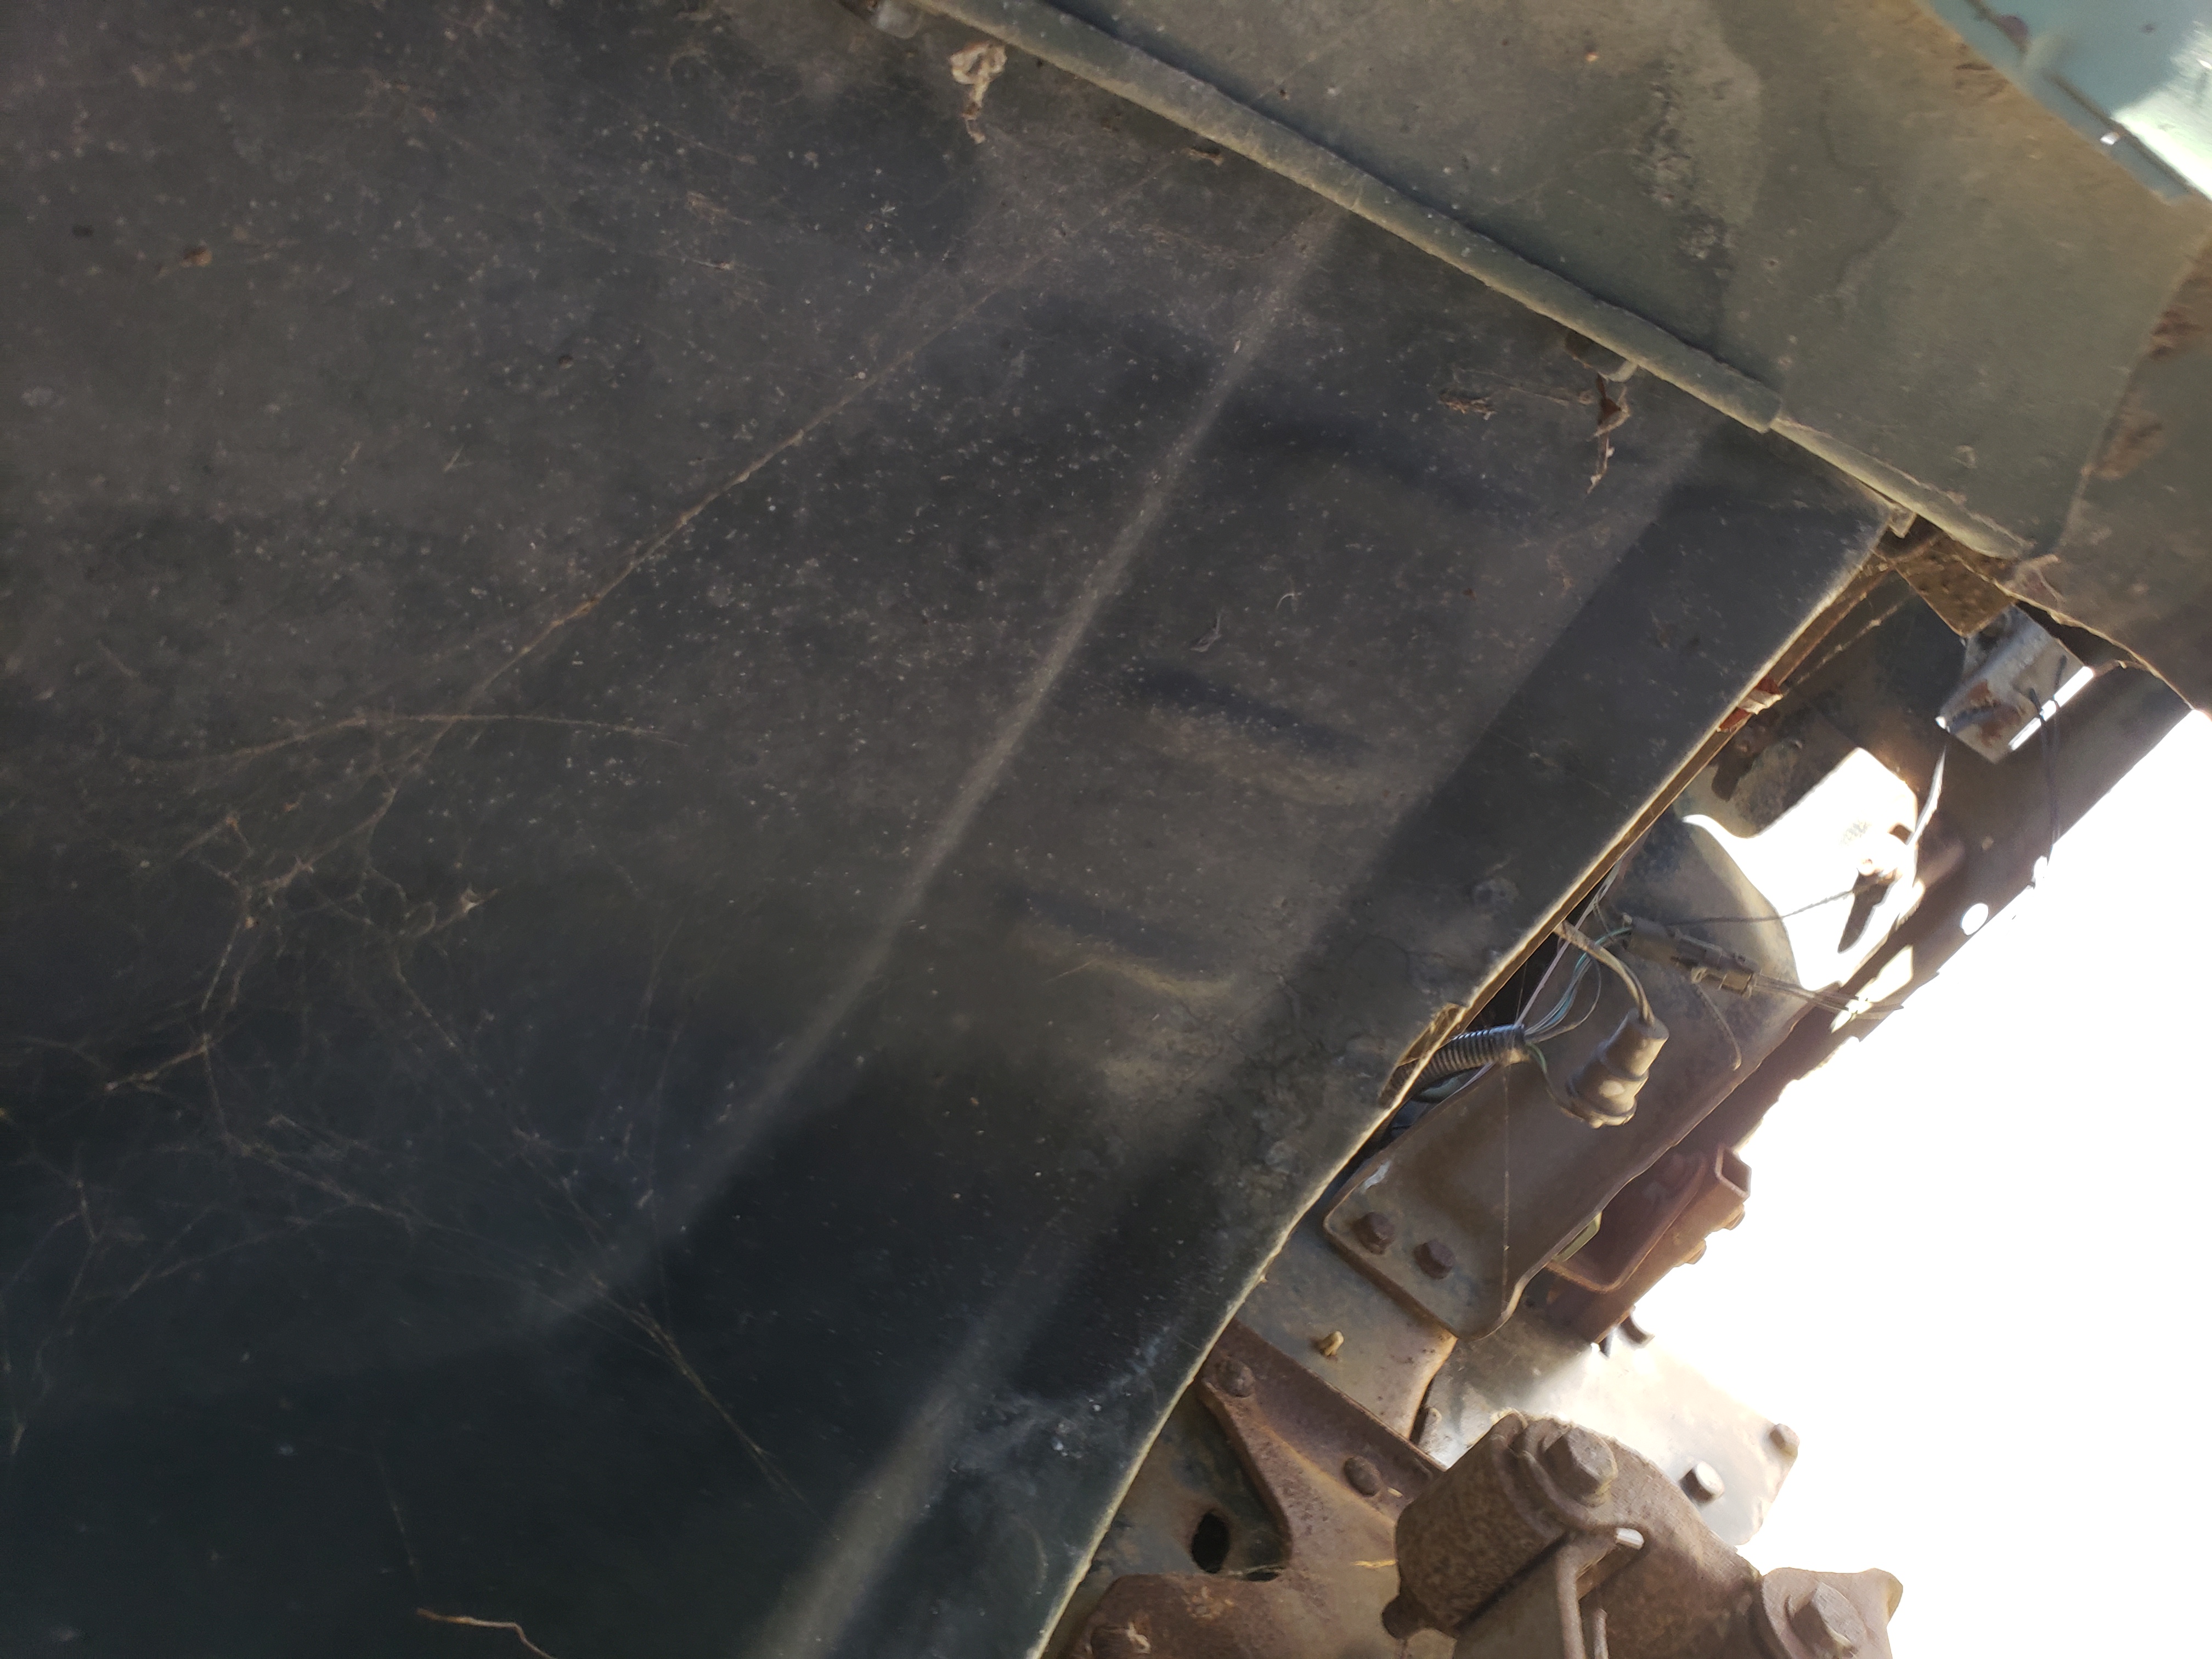
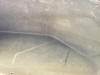
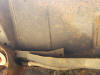
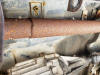
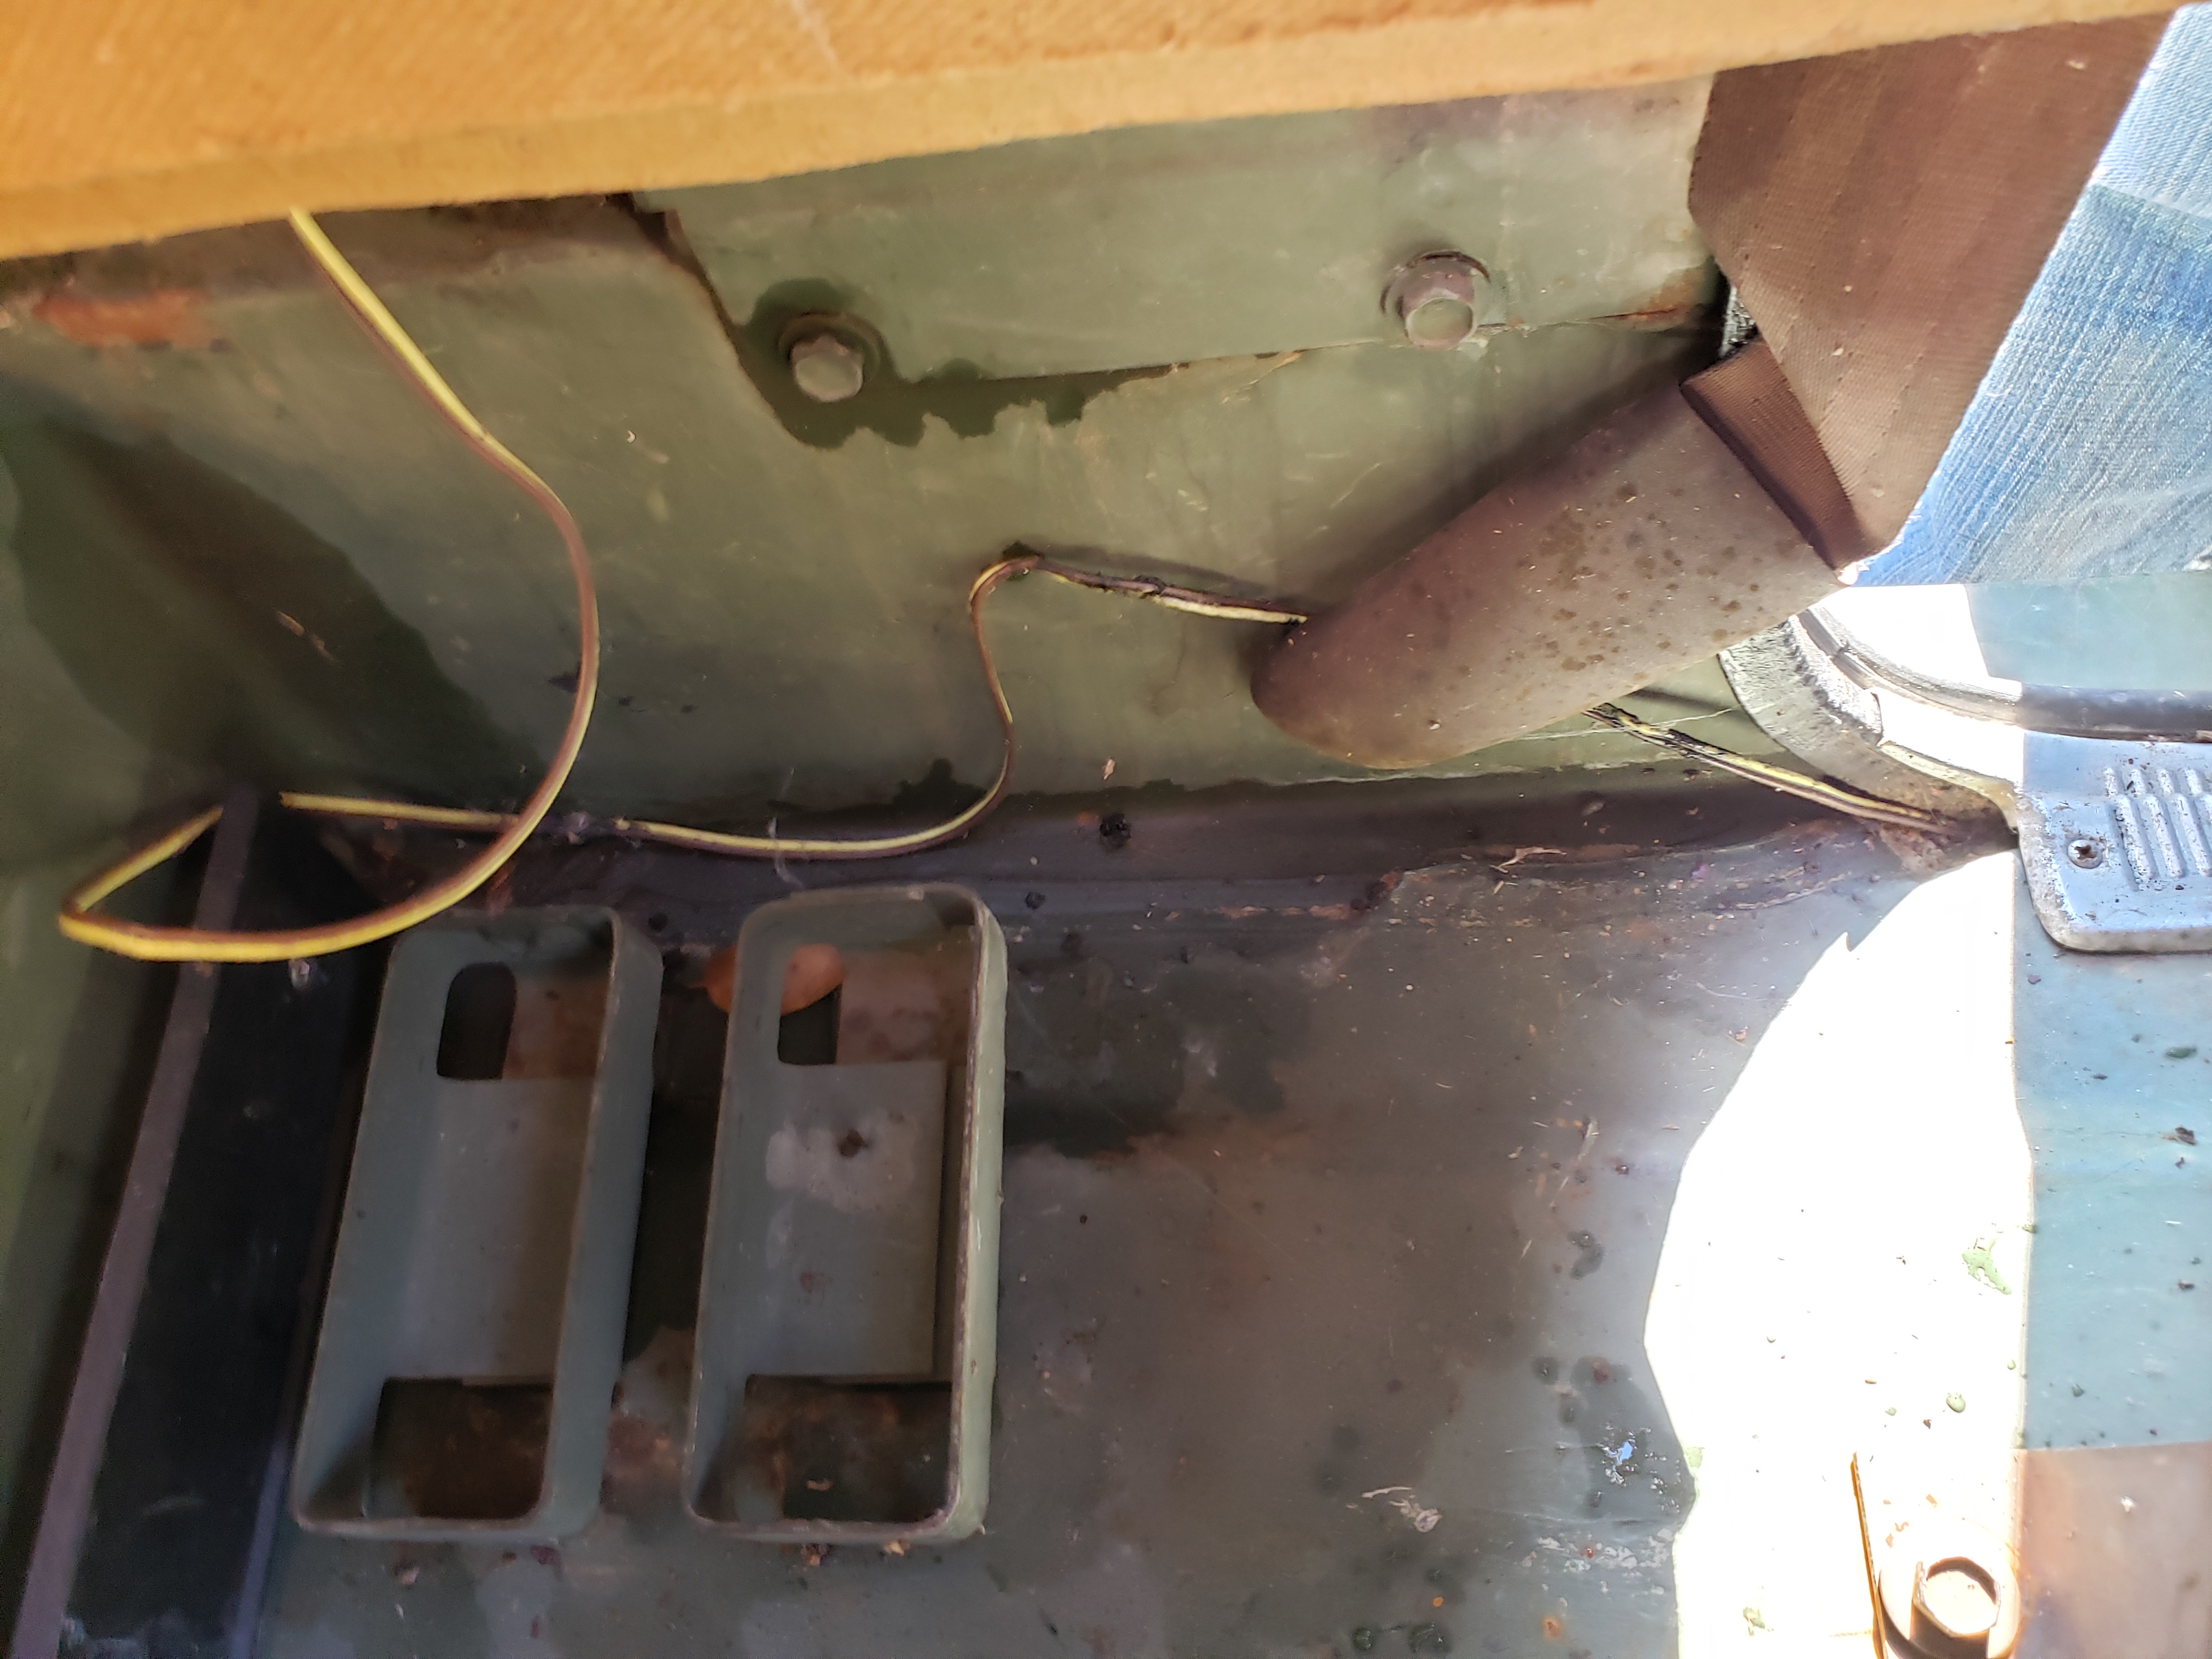
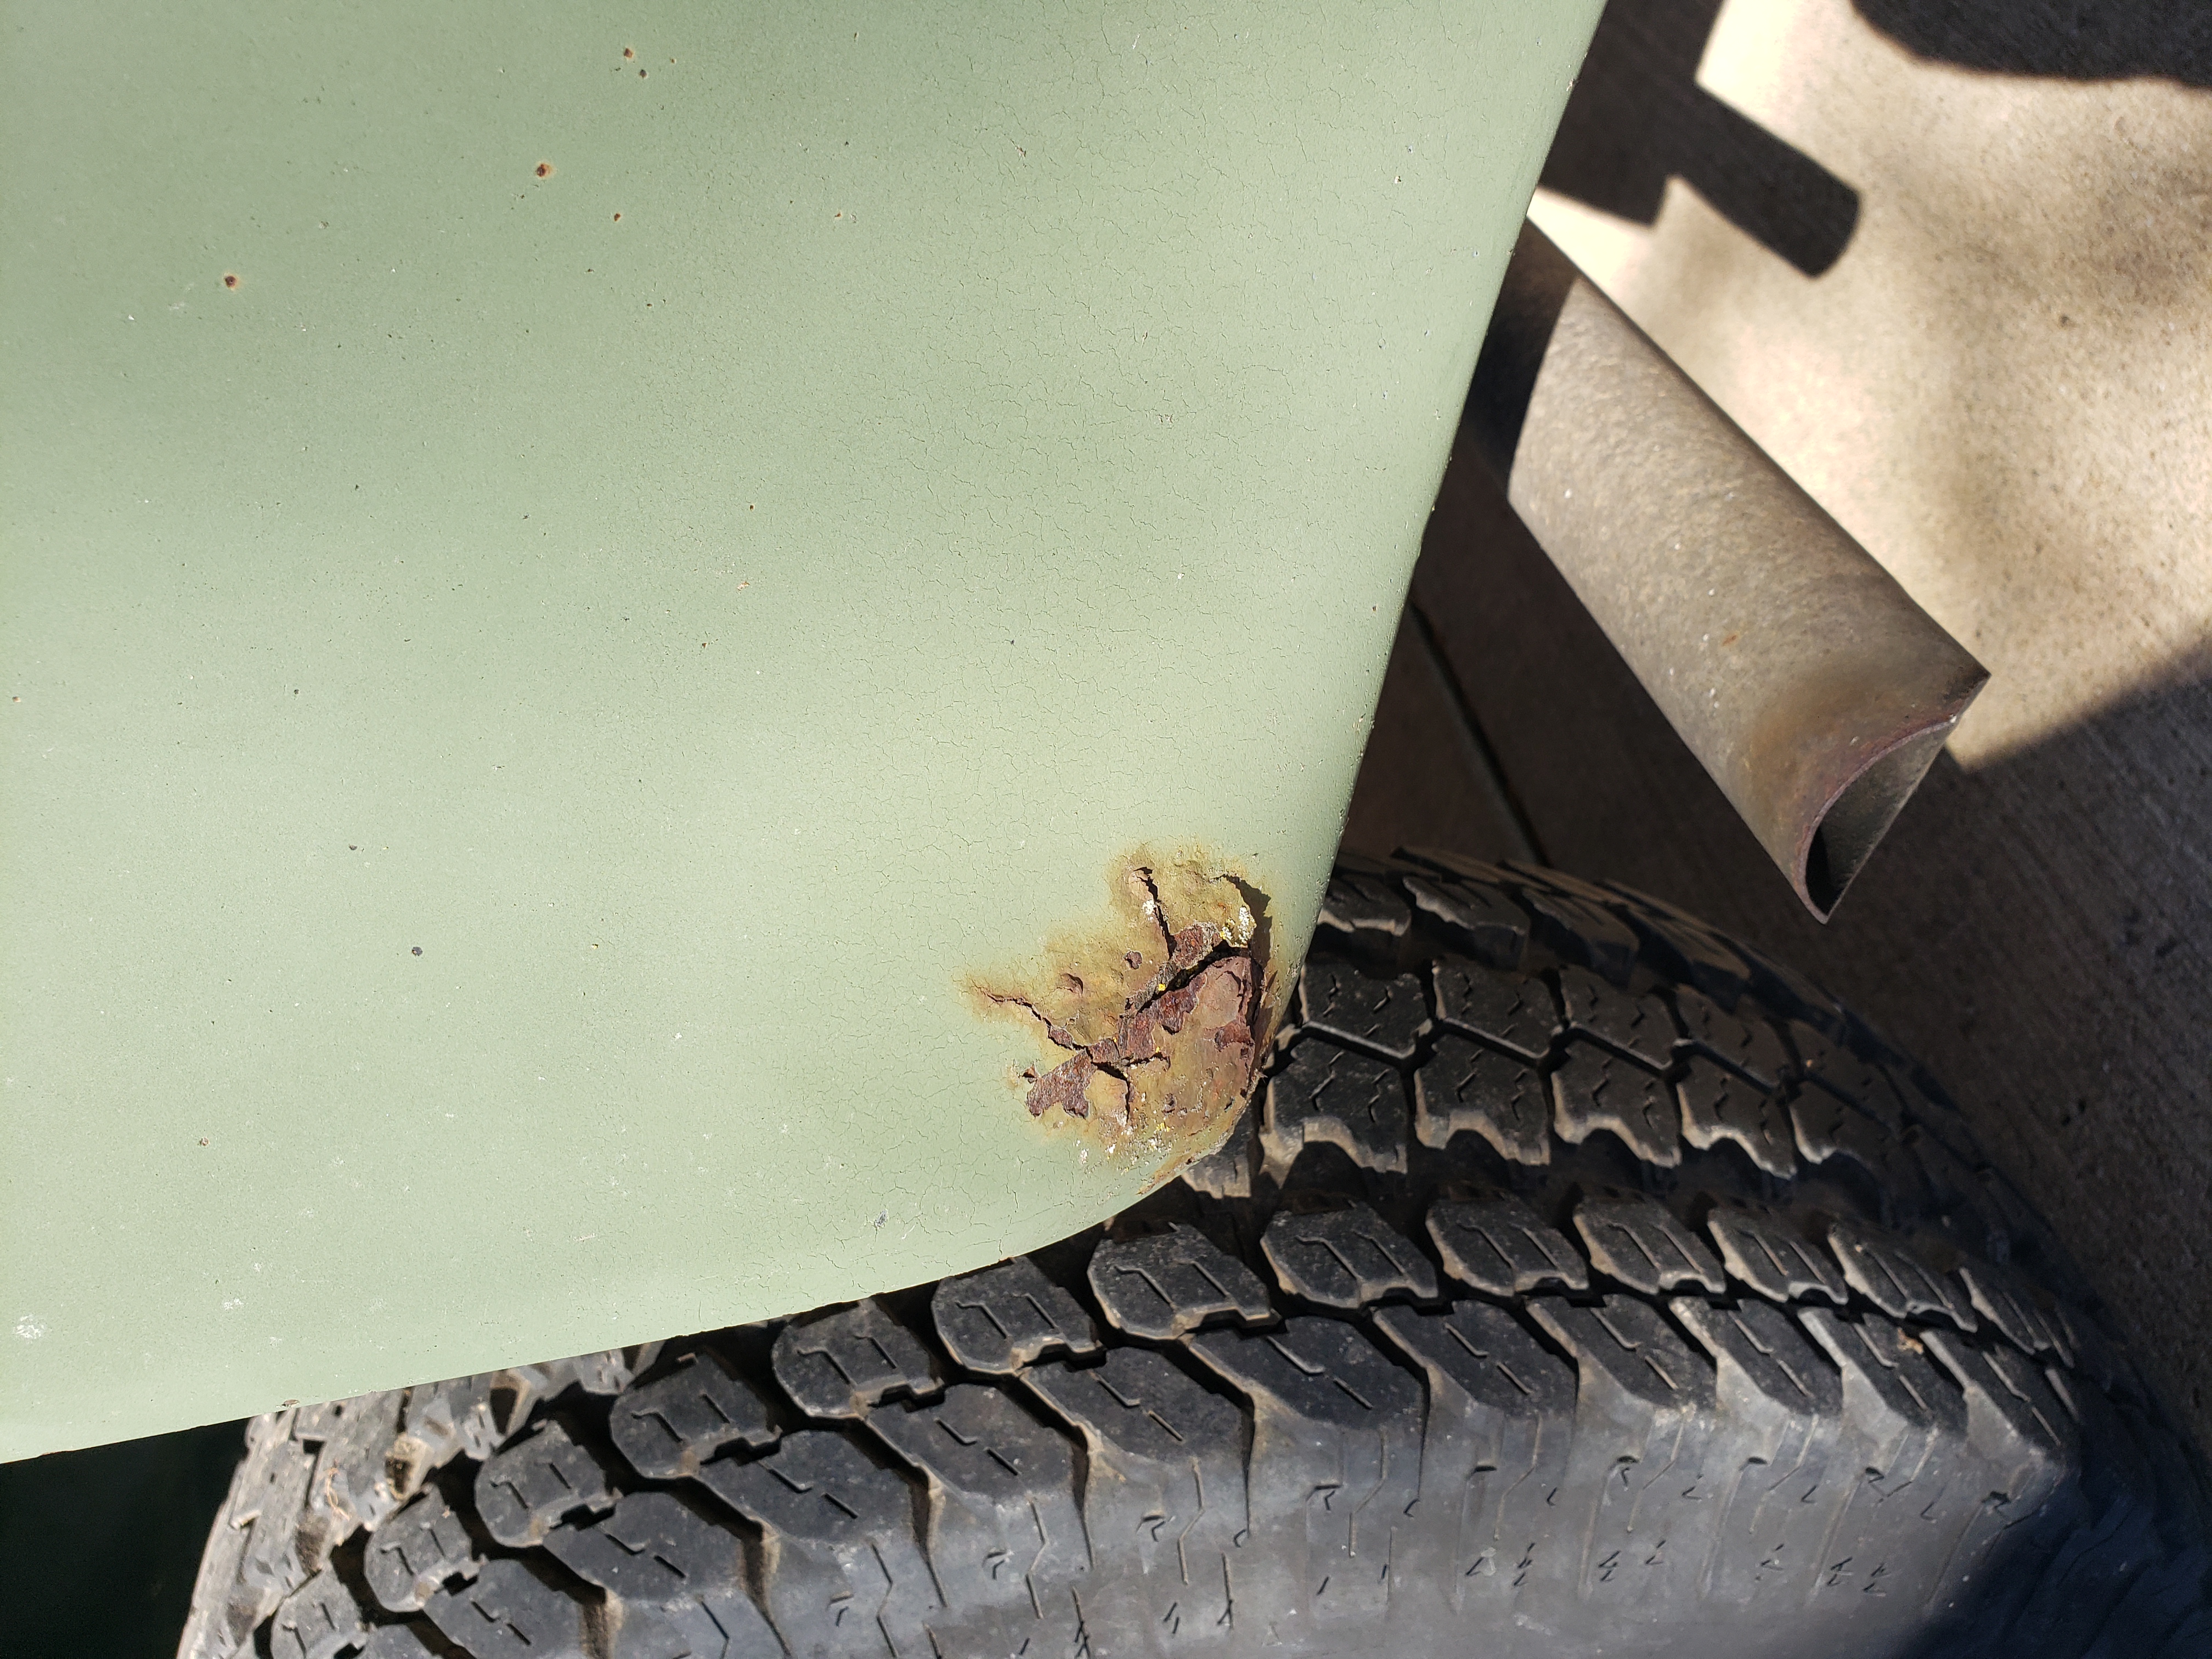
Front, Rockers, Rear and tailgate lower
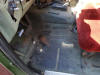
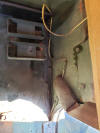
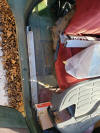
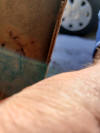
Driverside Front & Rear Floors and Rocker Passenger Rocker Rear Floor (there is a little melted water in some images)
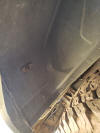
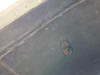
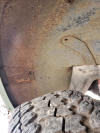
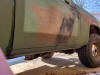
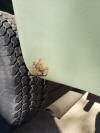
Passenger Side rear wheel well and drivers front wheel well
_small.jpg)

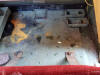
Drivers rear wheel well rust outside and inside and then Drivers Front inner wheel well and replacement fender
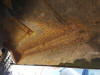
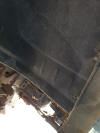
Driverside floor under side and rear wheel well
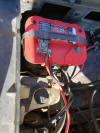
New Optima Red Tops July 2019
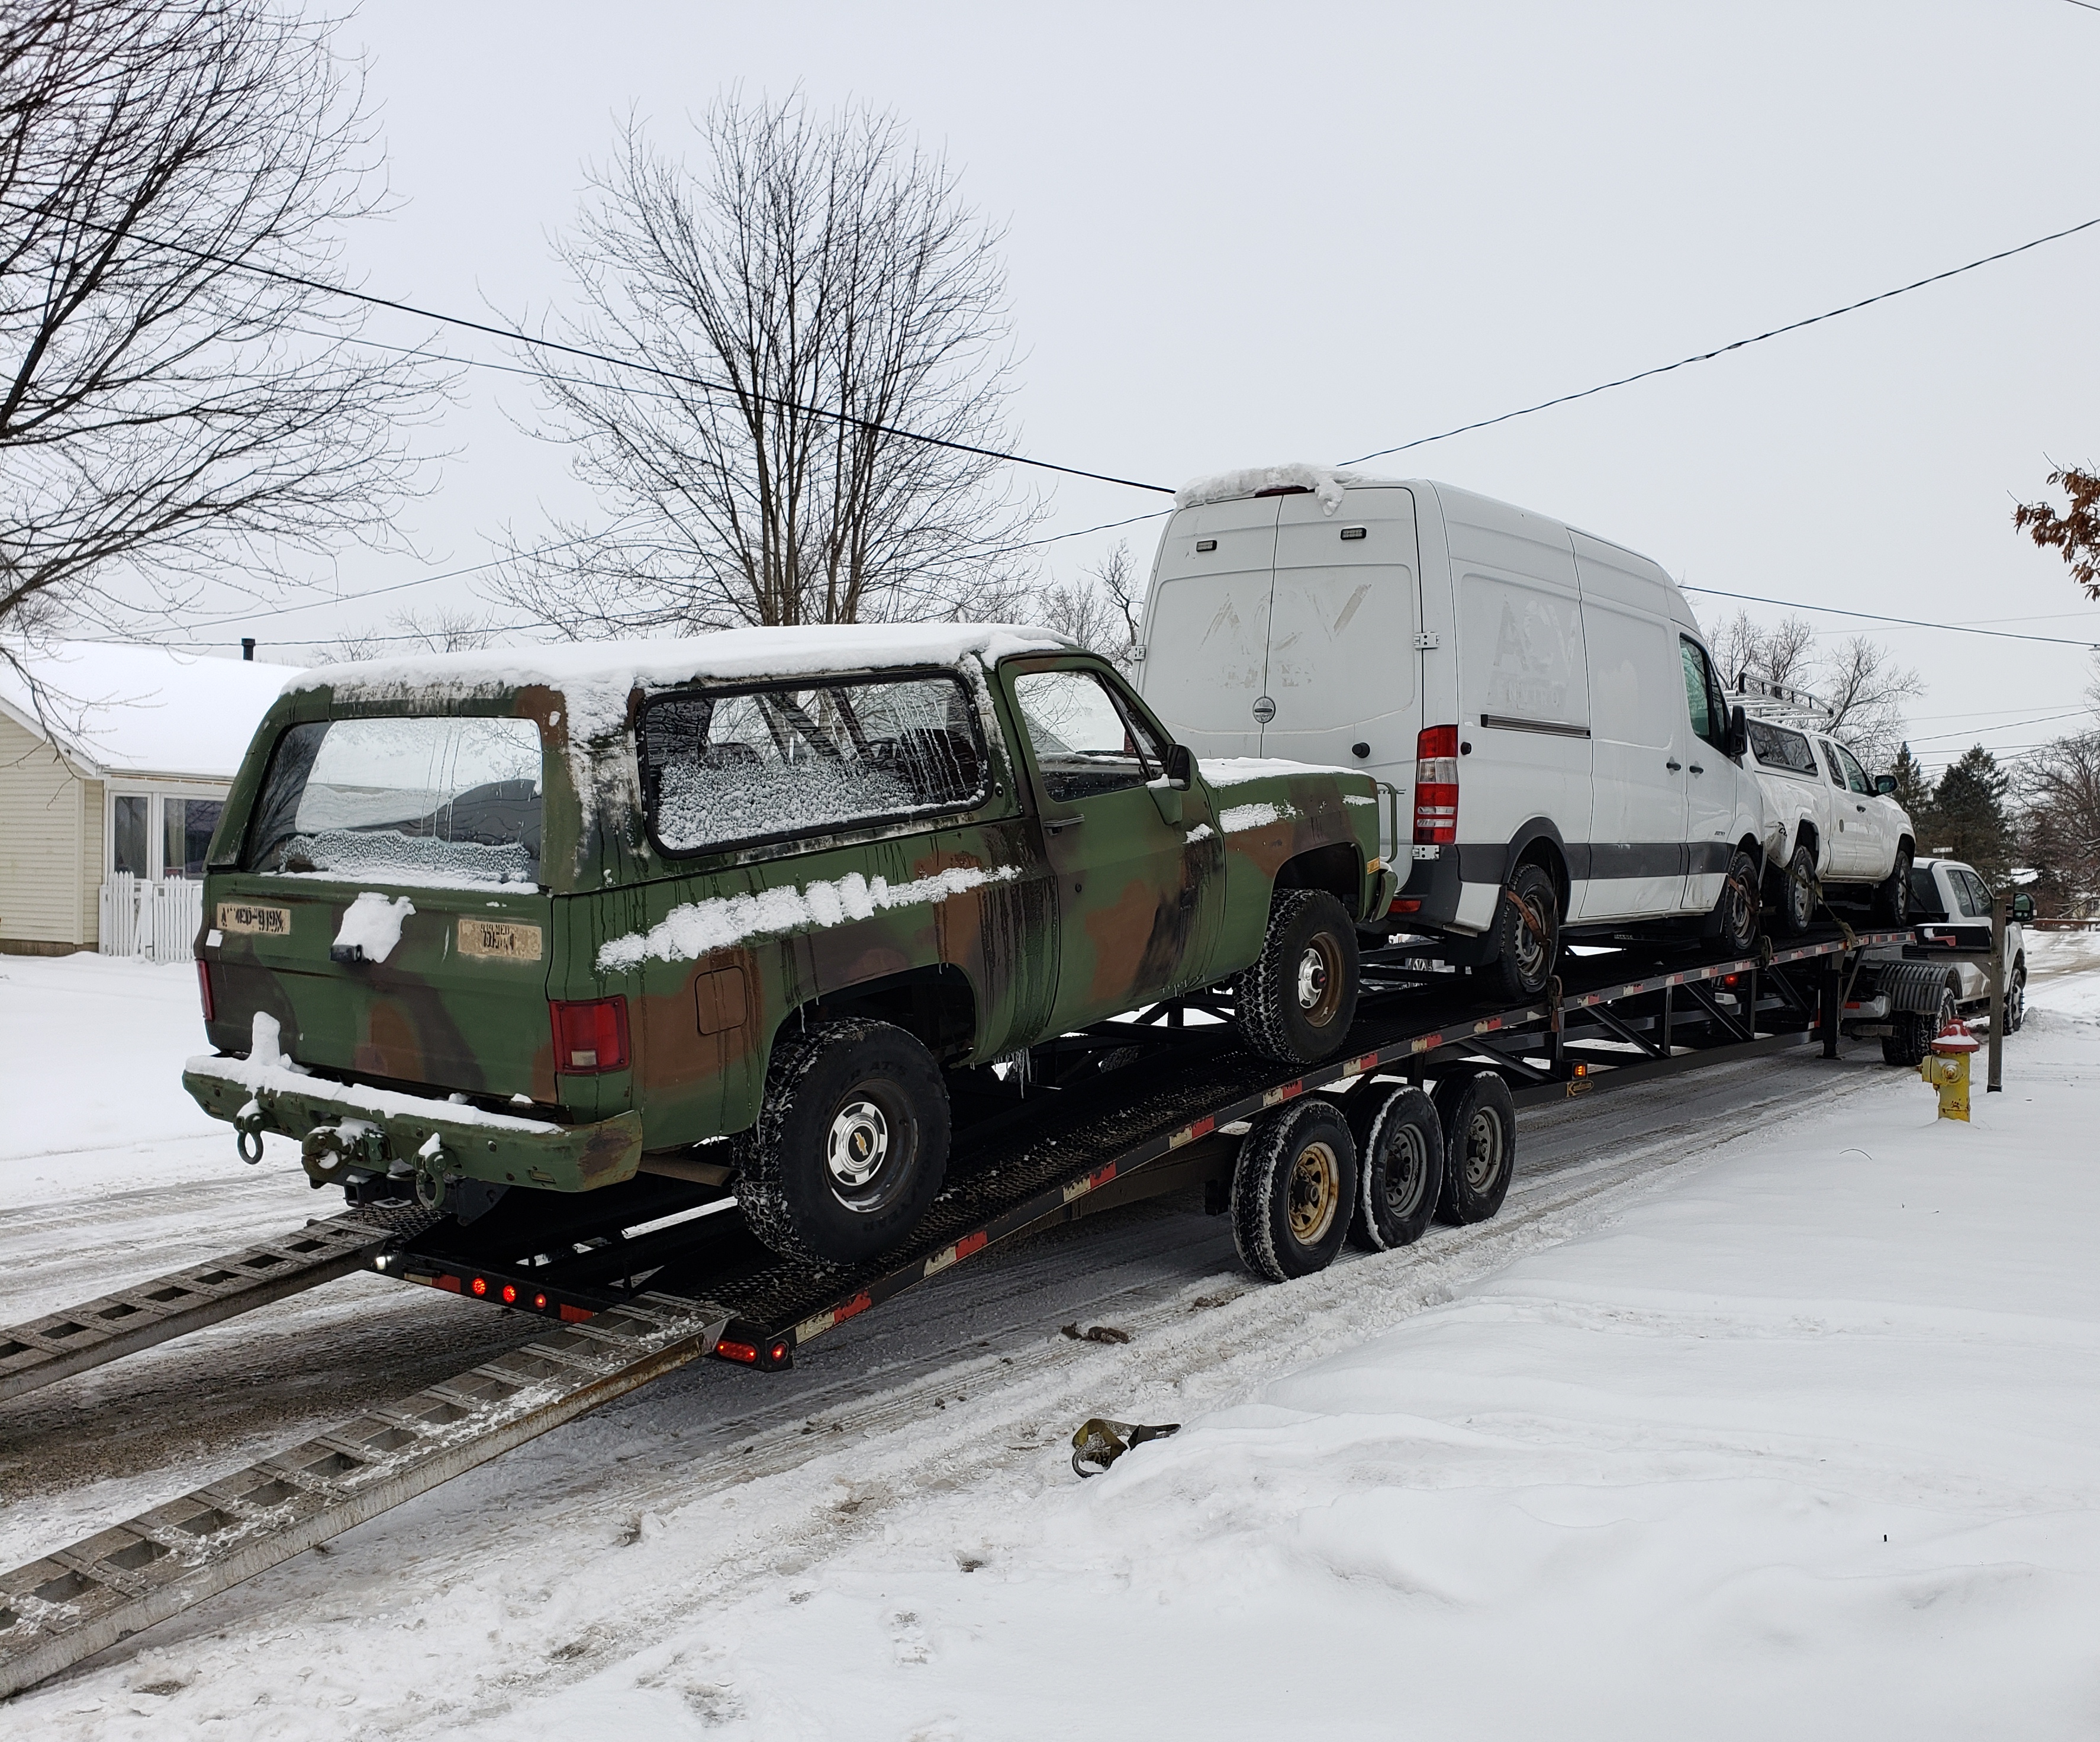
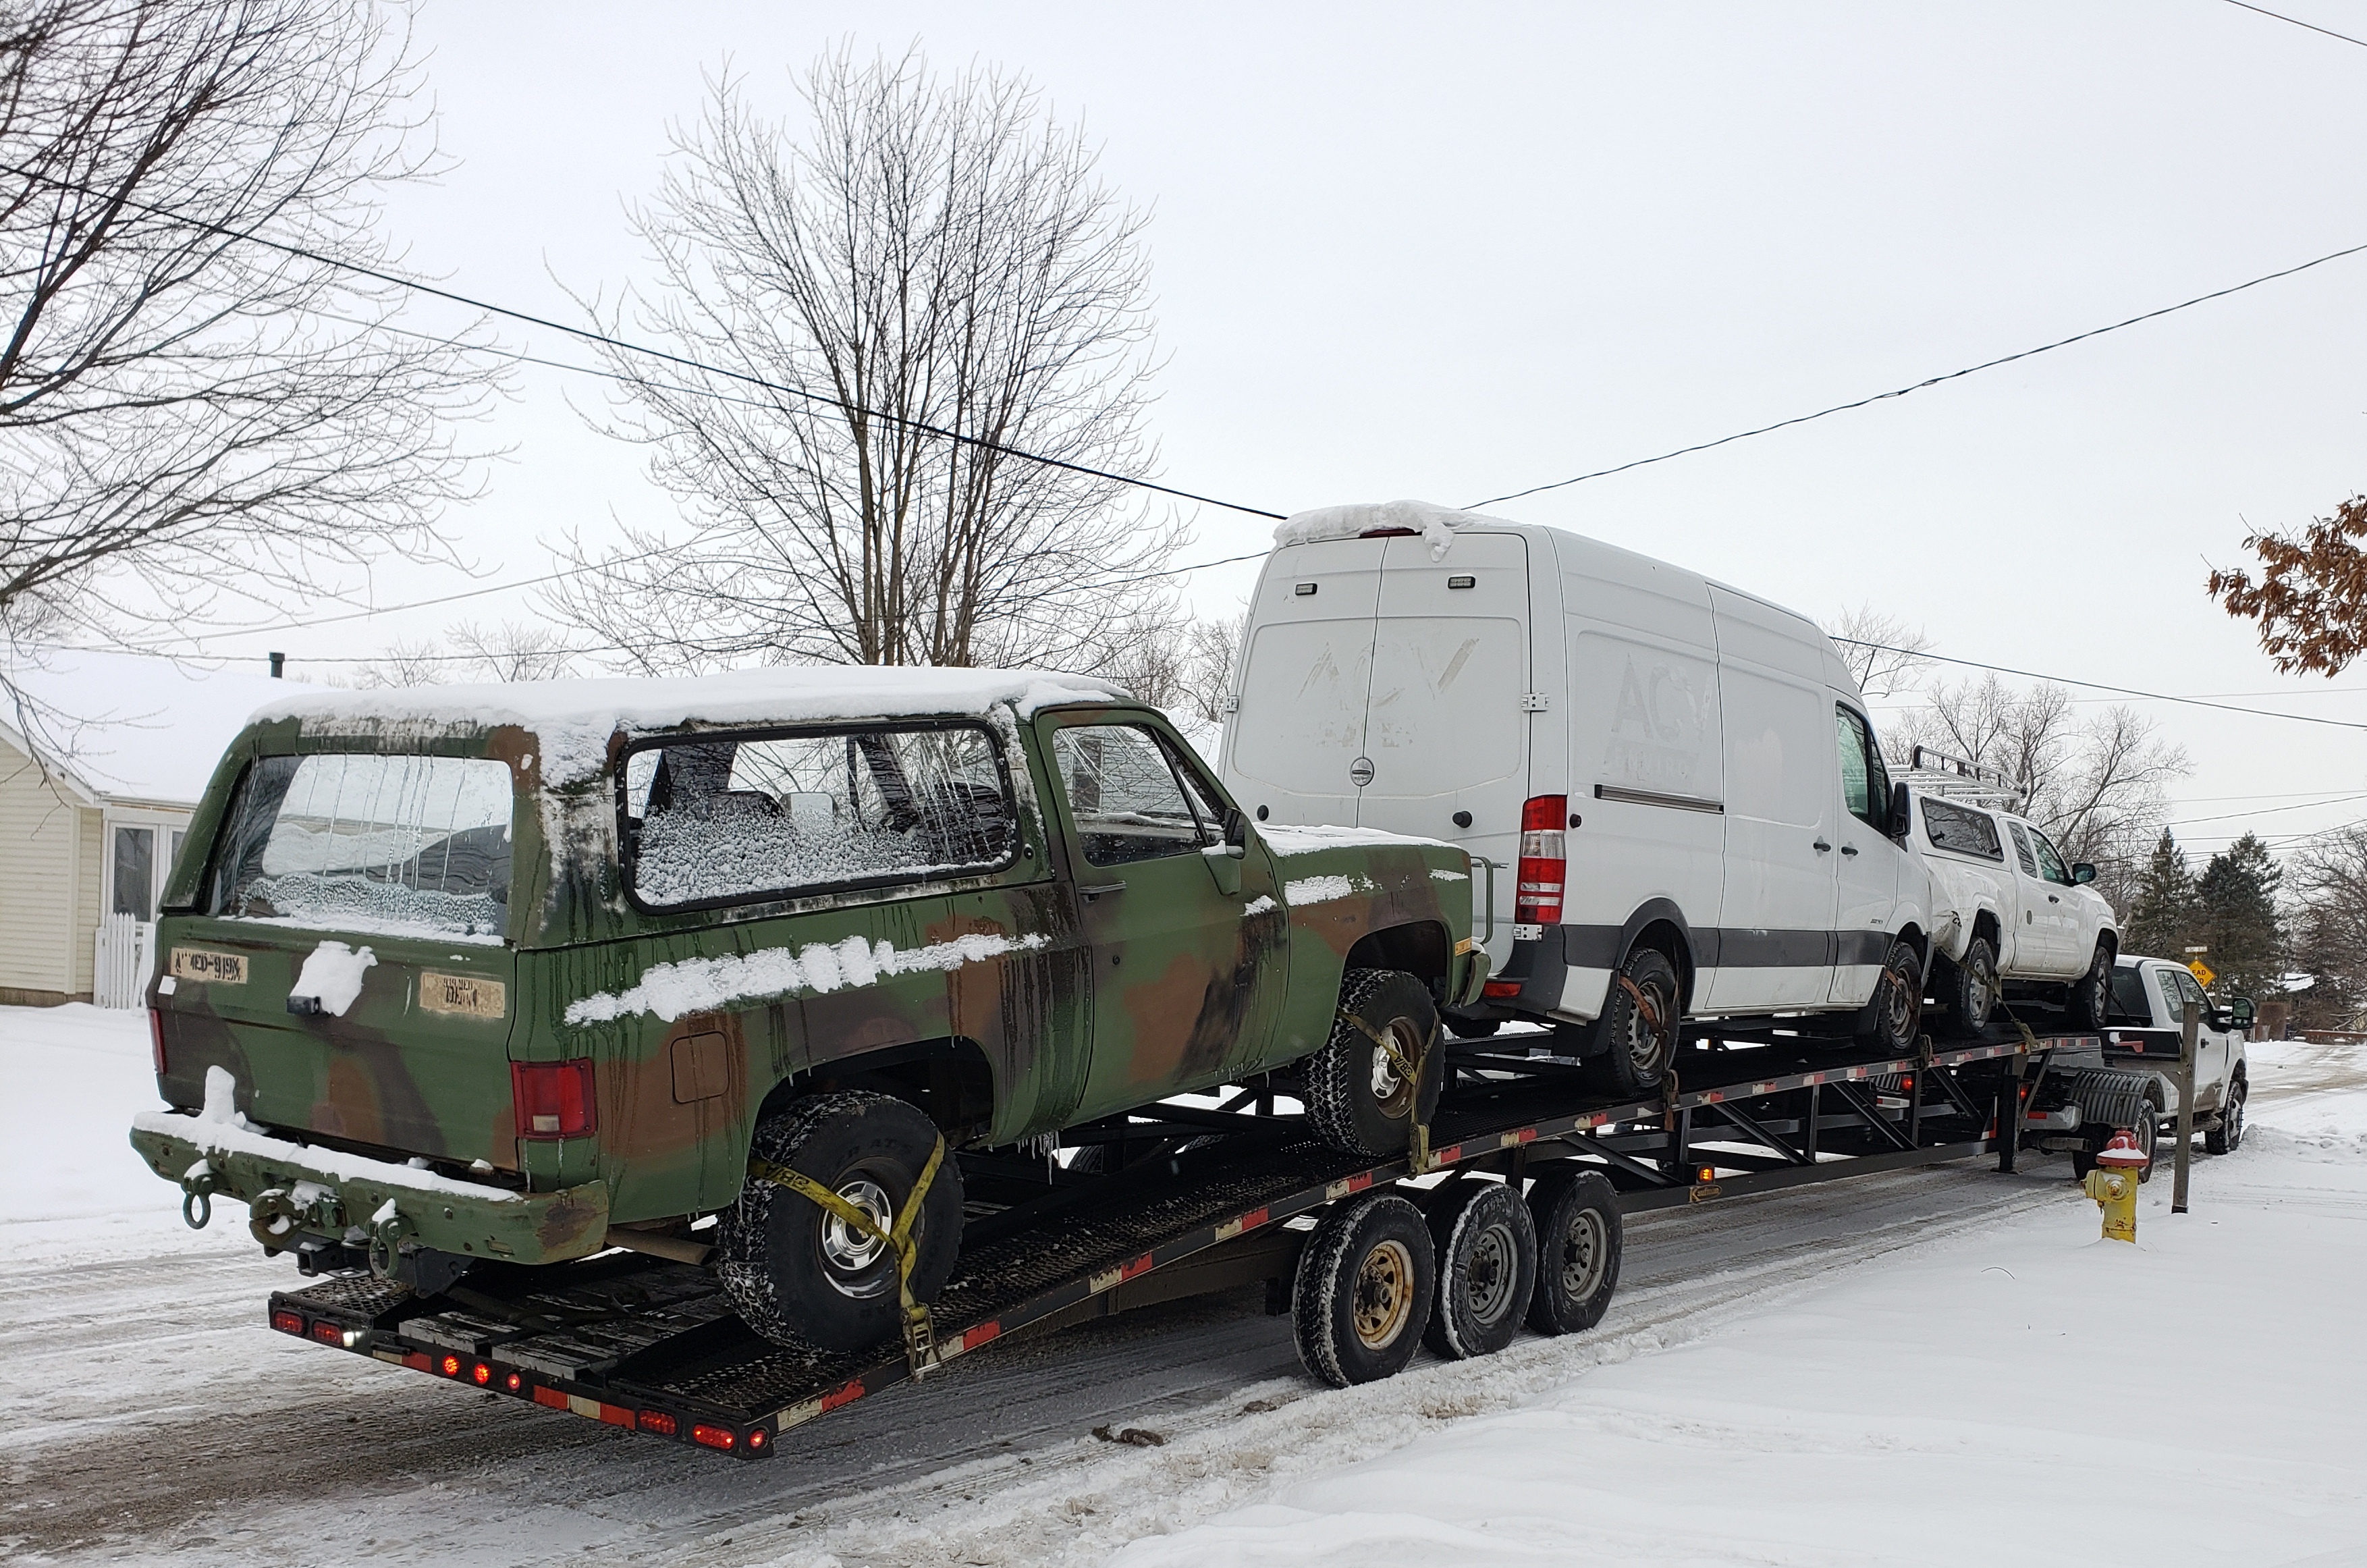
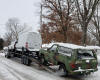
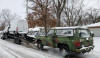
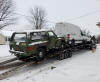
Feb 10, 2021
Get a phone call unexpected - Driver is two hours out
10 degrees, 6" snow on the ground
Hot Shot loaded and headed for California


.jpg)